Adding Estes as a Carrier
Return to Kuebix Partner Licenses (Starter Guide)
Follow these steps to connect your Estes agreement
1. On the Home page, click Add/Manage Carriers.
2. Click + on the top left to add a new carrier agreement.
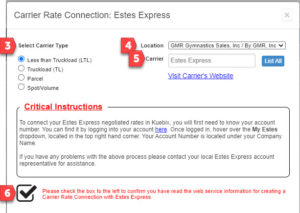
3. Select a Carrier Type.
4. If you have multiple locations, select the appropriate location. Each location should correspond to a unique Estes account number.
5. In the Carrier search box, type “Estes.” Select “Estes Express” when it appears on the drop down.
6. Click the checkbox below the Critical Instructions box. The critical instructions provide guidance on obtaining the carrier credentials required to successfully connect a carrier.
 7. Fill in the Username, Password, and Account Number.
Adding Estes as a Carrier video
Return to Kuebix Partner Licenses (Starter Guide)