One of the features available to Business Pro customers is to add items to their item book. There are different methods to do this.
Adding Items Manually
If you want to add items as needed or don’t have that many, adding them manually will be the easiest method.
Adding items via the Item Book (Classic)
To do this: Log into your Kuebix account.
Go to the “More” dropdown tab and select “Item Book”.

Click on “Create New Item Book”.
Enter the Item Name, Account name, SKU/Item Name, Class, and any other necessary fields.

Adding items via Ship It
Under Shipping Tools, click on Ship It.
Select “Add Item Details”, and then “Add From Item Book”

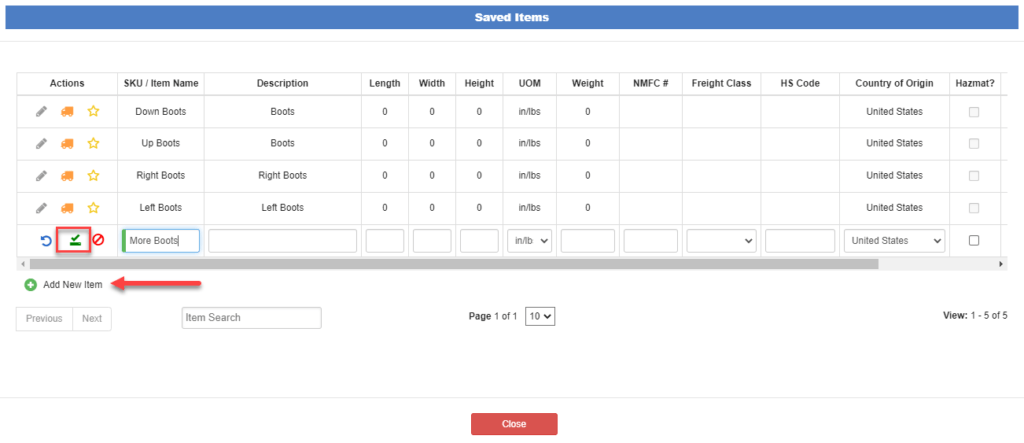
Select “Add New Item”, and enter the details. If the item is Haz-mat, click the check box, fill out all required fields indicated by the red bar, and click Ok.

To save the entered data, click on the green check mark.
*Note: Previously entered Items can also be edited from this screen, just click the pencil!
The SKU/Item name can now be entered into the “Item Search” field to bring up the newly saved information.
If you have many items to add, Items can be added via a Data Upload.
Adding Items via Data Upload
Using the Data Upload method allows you to upload your item book from a saved .csv file using the attached template, found at the bottom of the page under Article Attachments.
After signing into your Kuebix account, hover over your username in the top right-hand corner and select “Data Upload Tool” from the dropdown.

A list of options pops up, select “Your Commodities” and then “Upload File”.

Navigate to where your CSV file is saved (it MUST be saved as a .CSV file) and click “Continue”
Click “Create Template”, name and create the template.
In the Template Editor, click on a Spreadsheet Field and the matching Import field and then “Map Fields”.
You can also select “Auto Map Fields” to have the system do this for you – for this to succeed the Spreadsheet Fields need to match the wording on the Import Fields.
Once everything is matched, click “Save Template”.
Select your newly created template, and click “Import”.

