Building a Shipment (Order Integration)
You can use the Ship It page to locate an order that was passed to Kuebix from your ERP system. You can then build a shipment for that order, as well as retrieve and compare rates and book your shipment.
- Go to Ship It to begin creating your shipment.
- In the Order Search field, search for the order for which you would like to create a shipment.
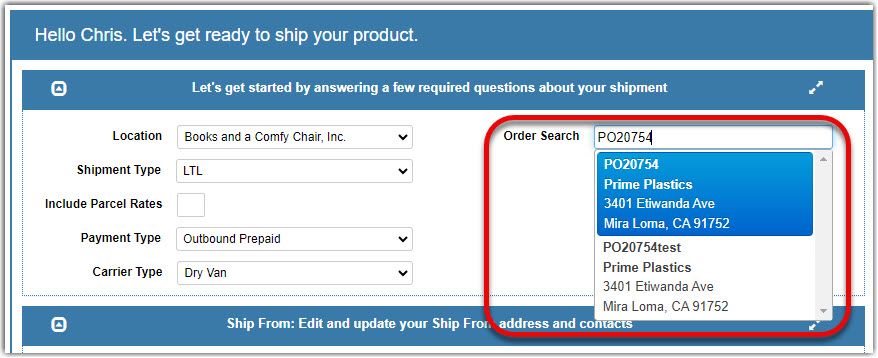
- Select the order that drops down after searching.
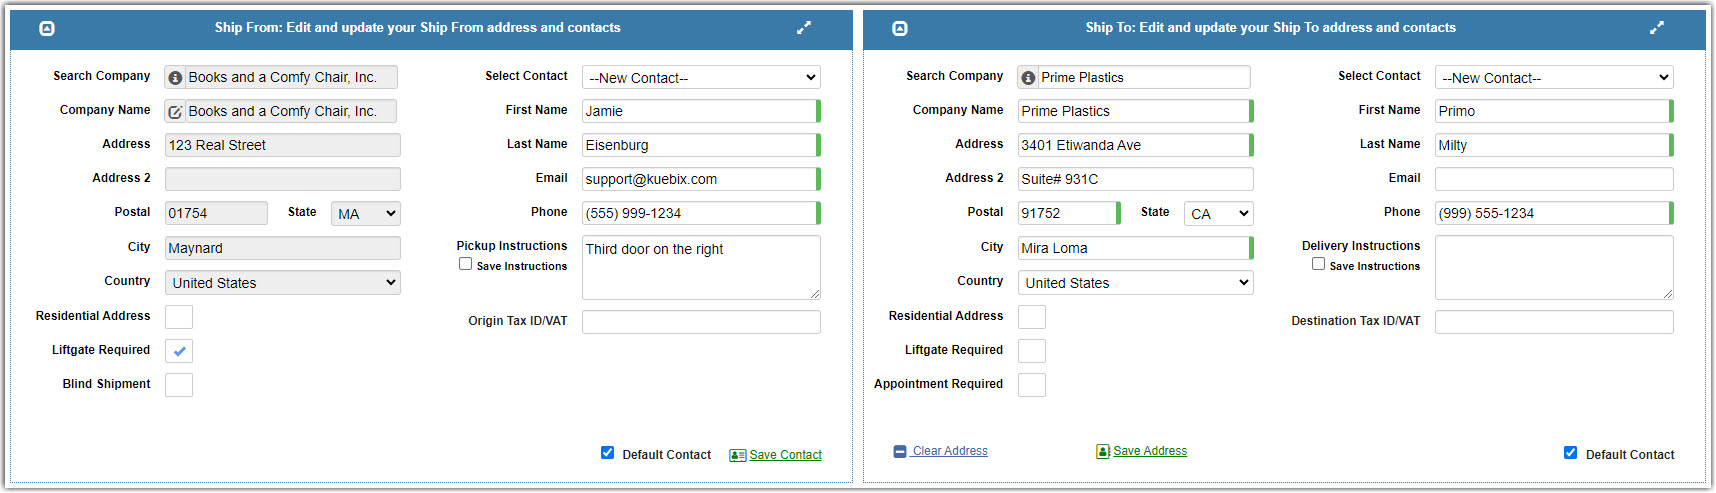
- Once you select your order, all of the order and shipment details populate into the appropriate fields.
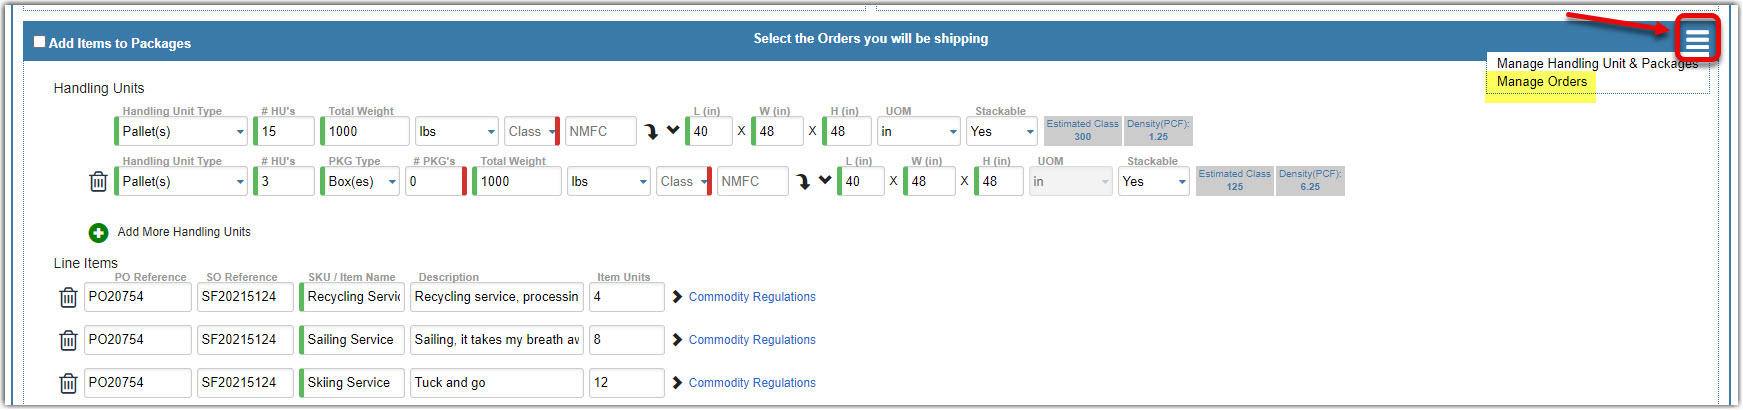
- At the bottom of the page, you can select which line items to add to your shipment. If you do not see the option, make sure Add Items to Packages is checked in the upper left of the area.
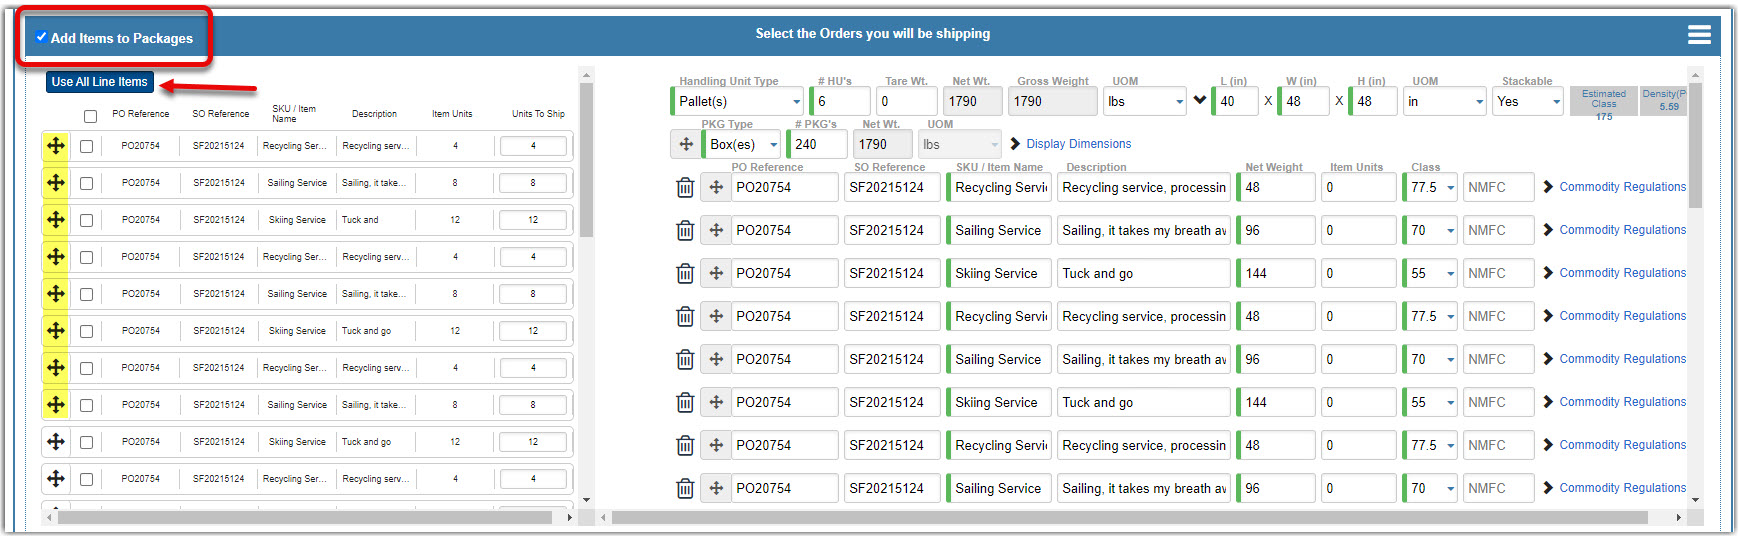
To add specific line items, you can drag and drop by clicking and holding the arrows icon, and dropping it in either of the indicated areas on the right. To easily add all of the available line items to the shipment, click the Use All Line Items button.
 - If you need to add additional orders to ship on this current shipment, click the 3 horizontal lines on the top right corner of the item entry page. This will pull up all of the orders that are also assigned to ship to this customer and address.
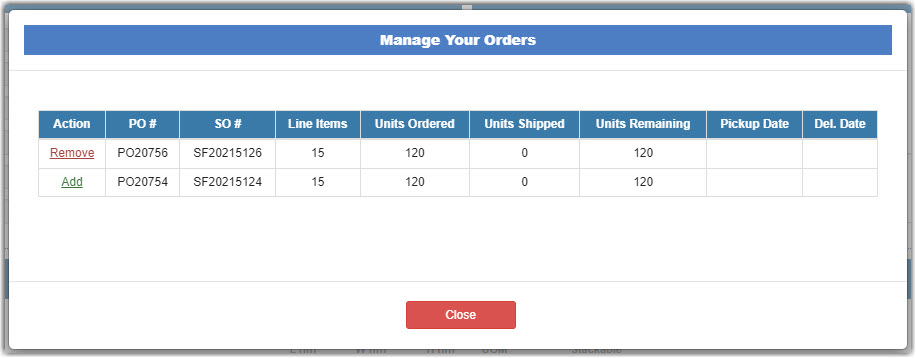
- Click Add next to the orders you would like to add to the current shipment. These new orders will appear on the left column next to the item entry page. You can then repeat step 5 and get these orders added to the shipment.
- Once your shipment is built, click Get Rates. This pulls all of your carrier rates and displays them side by side.
- After viewing and selecting the rate you would like to choose, click Book Shipment.
- Once you book your shipment, you will see the below pop up asking if you would like to have Kuebix schedule your pickup. If you would like Kuebix to schedule the pickup, click OK. If not, click Cancel.
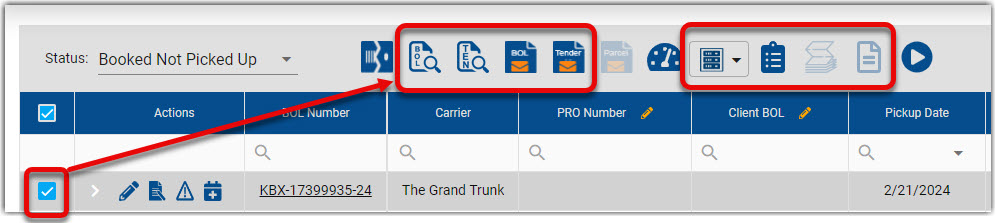
- Your shipment is now booked. You can access your shipment documents on this page. You can also access all of these documents on the Manage Shipments page.