The Carrier Invoice Management grid will display Account Payable records automatically for shipments that have a PRO number assigned and have been updated to delivered status using the shipment track function.
For details on assigning PROs or how to mark a shipment as delivered, please refer to the Shipment Track video in our carrier portal training series.
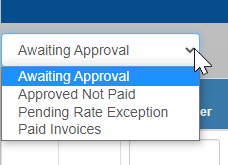
In the Carrier Invoice Management grid, there are four statuses for filtering: Awaiting Approval, Approved Not Paid, Pending Rate Exception, and Paid Invoices. Click on the drop-down arrow to choose the status you would like to view. When invoices first come into this grid, they are listed under Awaiting Approval.

1. To approve the rate for invoicing, there are two required fields:
a. Carrier Invoice Number and Carrier Invoice Date.
b. After entering the information in those two fields, click on the Gear icon under the Actions column and then select Agree to Rate.

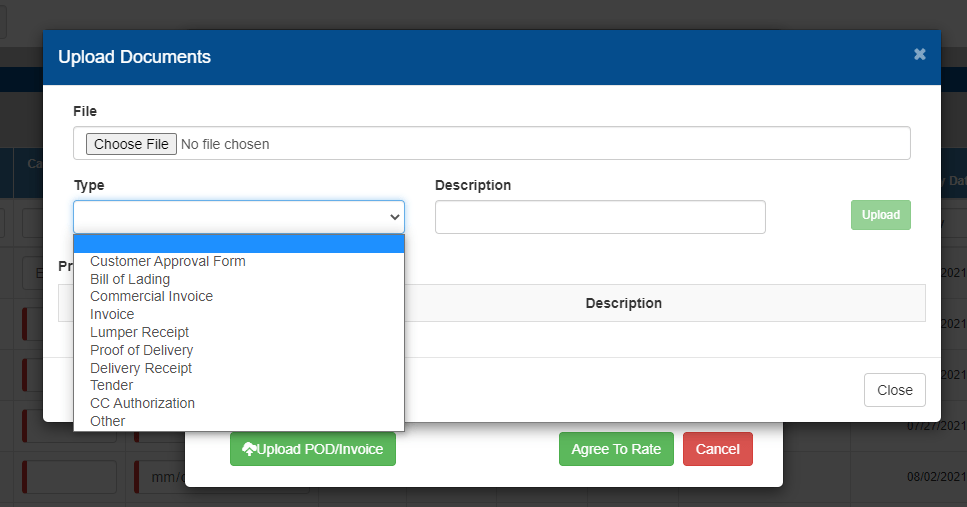
c. In the Carrier Invoice pop-up window, click Agree To Rate. Before agreeing to the rate, you can add Comments here that will be visible to the customer. You can also upload attachments such as the proof of delivery or a copy of the invoice using the Upload POD/Invoice button. Neither of those is required to submit a rate approval (unless otherwise noted by the customer).
2. To submit a Rate Exception:
a. First, add the Carrier Invoice Number and Carrier Invoice Date.
b. Click on the Gear under the Actions column and select Rate Exception.
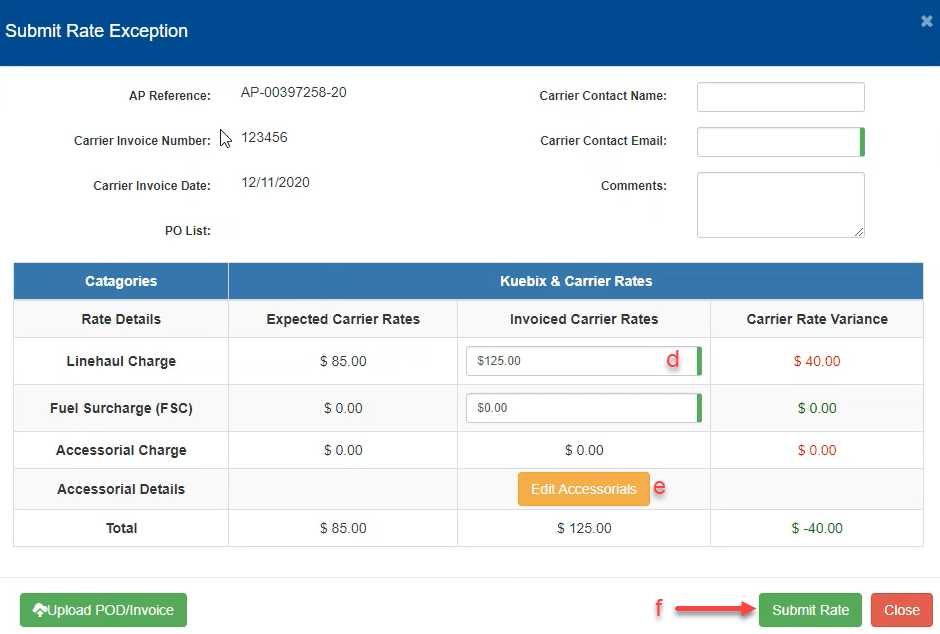
c. In the pop-up window, you can review the current data for this invoice. Please note that fields marked in red are required and cannot be left blank. Other fields, like the Carrier Contact Name, Carrier Contact Email, and the Comments section are all optional. You can also upload attachments from this panel, but they are not required.
d. Enter a new Line Haul Charge and Fuel Surcharge in the corresponding fields. Please note that if you do not need to adjust one of these lines, information must still be entered. Simply enter the original data to proceed.
e. To add accessorials that were not included in the original quote, click Edit Accessorials and add the required information. Click Save if you are done, or Add Accessorial if you have additional ones to include.
f. Once all of the information is entered, click Submit Rate. This will create a rate exception for your customer to review.
Once an invoice has been approved, it will live in the Approved Not Paid status of the Invoice grid. Please note there is no action required for invoices in Approved Not Paid status.

The Pending Rate Exceptions status is where invoices with disputed charges reside until the customer approves the new rate.
1. To review details of a specific invoice, click the Details button on the far left.
2. To edit information or review customer submissions, click on the Gear icon under the Actions column, and then click Rate Exception.

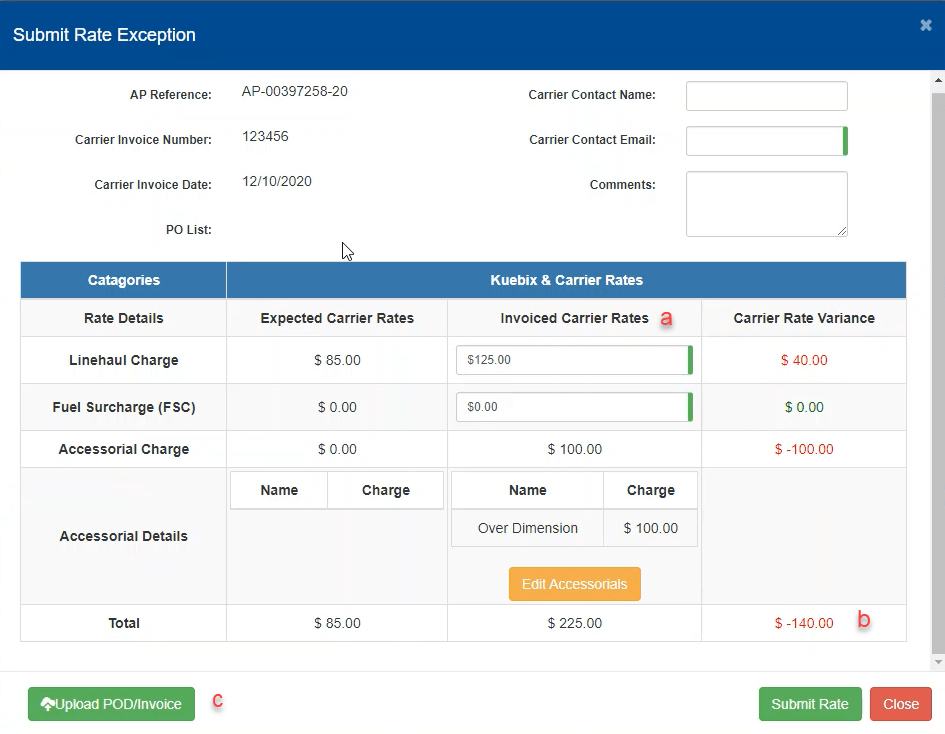
3. Customers can approve the carriers’ new rate as shown in the center column (a) or they may dispute the rate via email. The price difference between the original invoice and the rate exception can be found on the right column under the Carrier Rate Variance (b). Attachments can also be added here using the Upload POD/Invoice button (c), and will need to be identified.


Once the invoice is approved by the customer, invoices move to the Approved Not Paid status.
The Paid Invoices status is where invoices go once approved by both the carrier and the customer. These invoices will remain here indefinitely for your reference and no additional action is required.

