Below you will learn how to create and manage your lanes and rates:
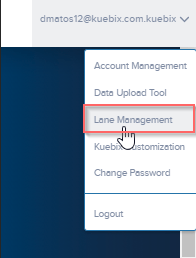
- Select Lane Management from the drop down menu under your username (top right corner of the screen).
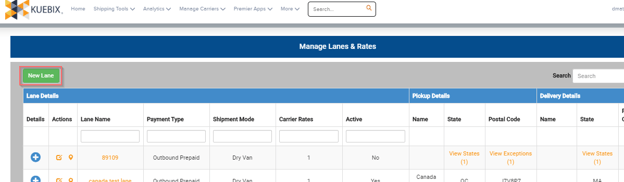
- Select the green New Lane button.
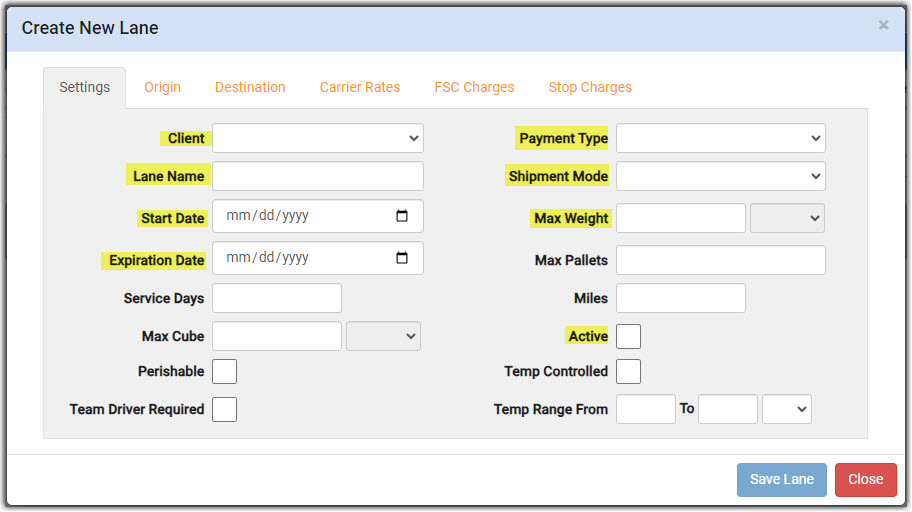
- Complete the Settings tab. Here, your will create a Lane Name, Start Date, Expiration Date (if applicable), Miles, Payment Type (Outbound Prepaid, Inbound Collect, Third Party), Shipment Mode, Max Weight, Max Pallets, Temp Controlled (select if this is a Temperature Controlled lane and the Temp Range, if applicable). Also, please make sure to check Active.
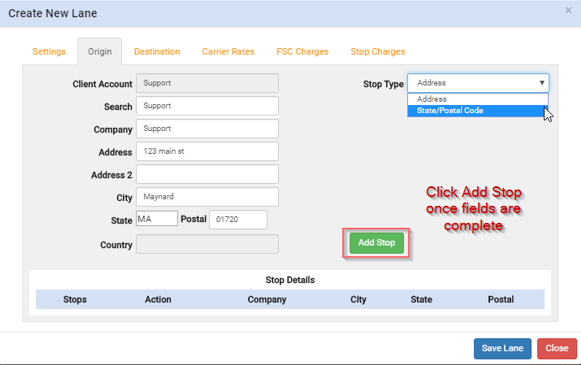
- Move to the Origin tab. Here, you will enter the origin information by first selecting the Stop Type (Address or State/Postal Code).
- For a specific origin address, select Stop Type: Address, and fill out the address information. Then click the green Add Stop button.
- For specific origin State/Postal Code, select Stop Type: State/Postal Code. Select the origin Country, followed by the state in the available states list. Then, select that state from the Exception State drop down. Lastly, enter the Postal Range and click the green Include button. If you are entering a single Postal Code, enter it in both fields (i.e. 90210 to 90210).
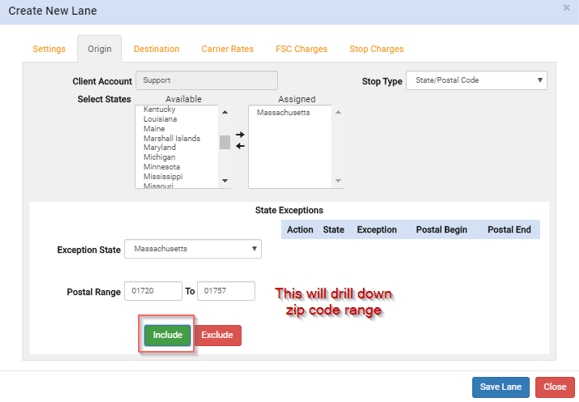
- For a specific origin address, select Stop Type: Address, and fill out the address information. Then click the green Add Stop button.
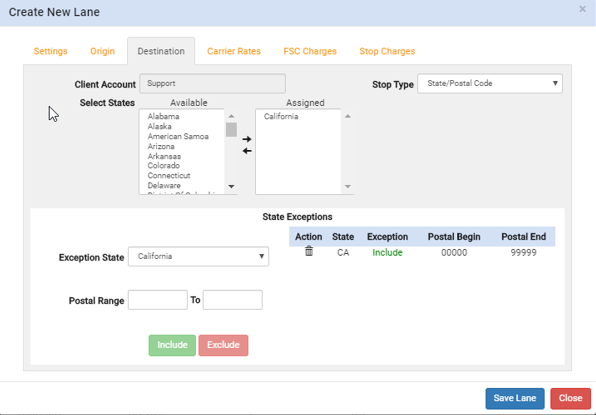
- Move to the Destination tab. Perform the same steps for the destination Address or State/Postal Code.
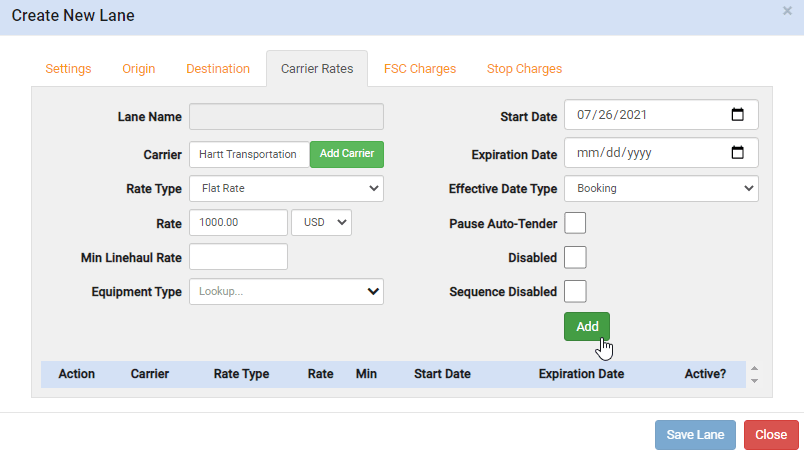
- Move to the Carrier Rates tab. Here, you will enter your carrier(s) rates for this lane.
- Select the Carrier by typing the name and selecting from the carriers that appear.
- Select the Rate Type (Flat or Per Mile).
- Select the Start Date for this rate.
- Select the Expiration Date for this rate, if applicable. Then, click the green Add button.
- Repeat these steps for any other carrier rates you may have for this lane.
- If you have an FSC rate for your carrier, you can upload it in the FSC Charges tab, using the downloadable FSC Template available on the FSC Charges tab, or at the bottom of this article.
- If you have specific Stop Charges (Drop Charges) for your carrier(s) for multi-stop shipments, you can enter those charges in the Stop Charge tab.
- Save your lane by clicking the blue Save Lane button on the bottom right of the window.
- You can edit your lanes and any carrier rates, anytime. Simply go back into Lane Management and click the Edit Lanes icon in the Actions column for the desired lane.
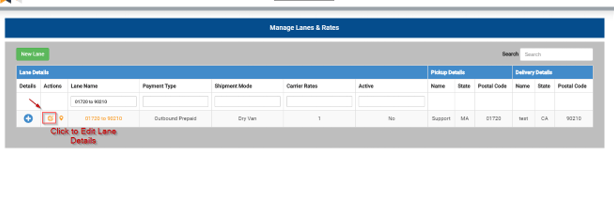
- You can edit your lanes and any carrier rates, anytime. Simply go back into Lane Management and click the Edit Lanes icon in the Actions column for the desired lane.
