There are three ways a PRO will be assigned to a shipment.
- The customer has a block of PROs, and the shipment is either an outbound prepaid or outbound collect.
- The carrier supports Auto-PRO assignment and the PRO is automatically assigned when the shipment is booked via API.
- The customer manually assigns a PRO number.
You can easily manually assign or update a PRO number using one of the following methods.
Using the Manage Shipments Grid as the starting point for all options below:
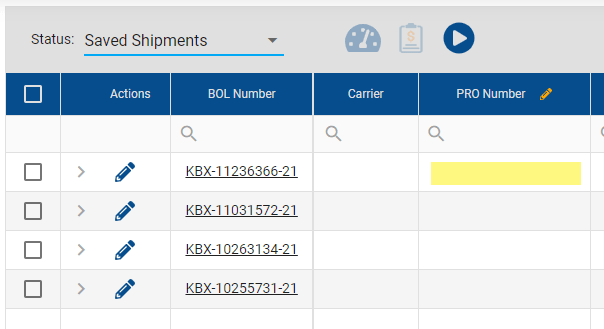
In either Saved or Booked Not Picked Up status, the PRO can be added or edited directly in the PRO Number column.
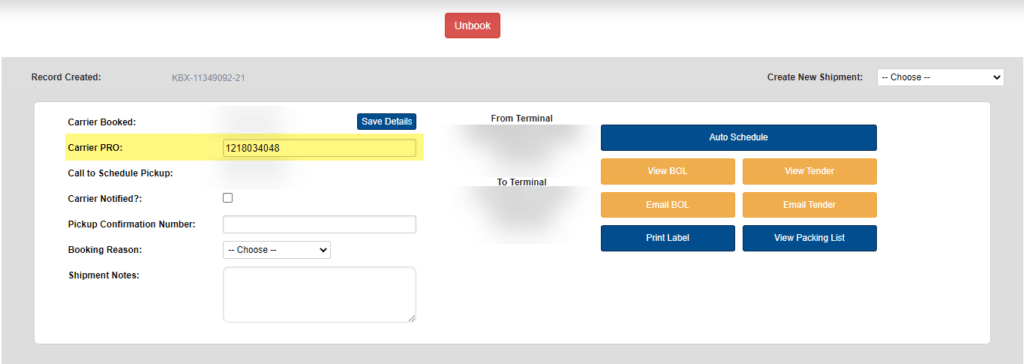
Another option is to edit the shipment by clicking on the Pencil icon on the left and opening the shipment.
*The shipment must be booked in order to use this method.*
The PRO number can be entered in the Carrier PRO field:
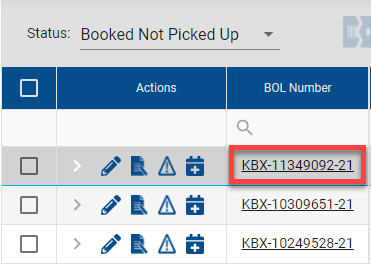
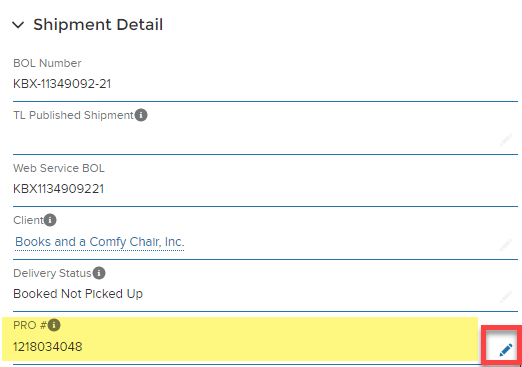
A third option is to click on the shipment BOL Number, which opens the shipment detail in a new tab.
Double clicking either the pencil or anywhere in the section highlighted will enable manual entry.
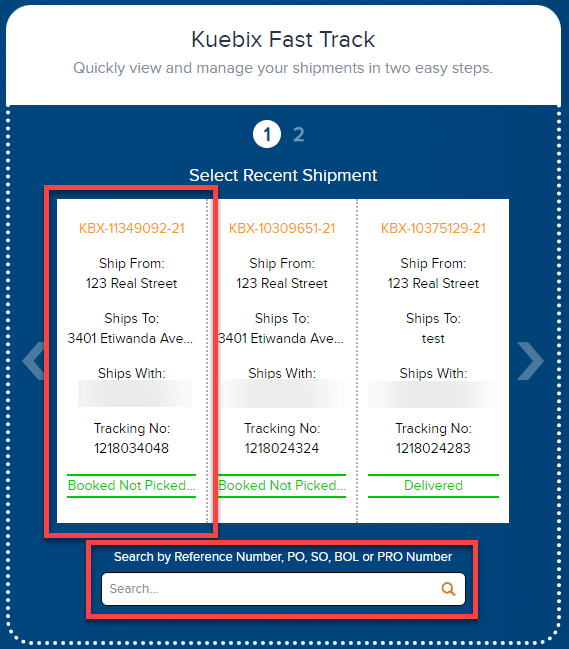
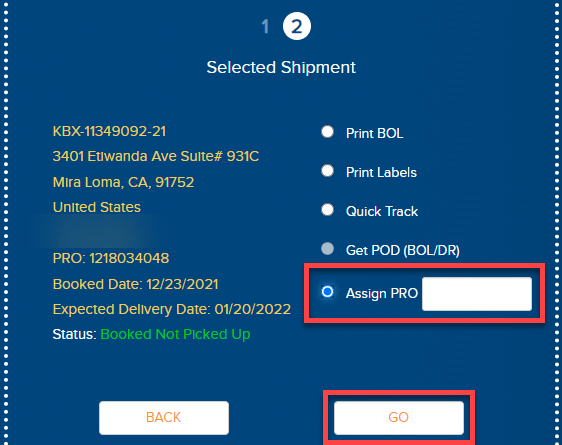
You can also use Kuebix Fast Track.
From the Kuebix Fast Track on your landing page:
You can either click on a shipment, or search by entering the Reference Number, PO, SO, BOL, or PRO Number.
Enter/update the PRO in the Assign PRO field and click GO.

Instructions on adding a block of PROs to a carrier agreement can be found here: Adding a range of PRO Numbers
If you have any issues, please reach out to Support by emailing support@kuebix.com and we will happily assist.
