Once you’ve created, booked, and scheduled your shipment you’ll need to add a label.
There are two ways to do this – while in the shipment itself, or from the Manage Shipments Grid.
From the shipment screen itself, on the right side of the screen there is a Print Labels button.
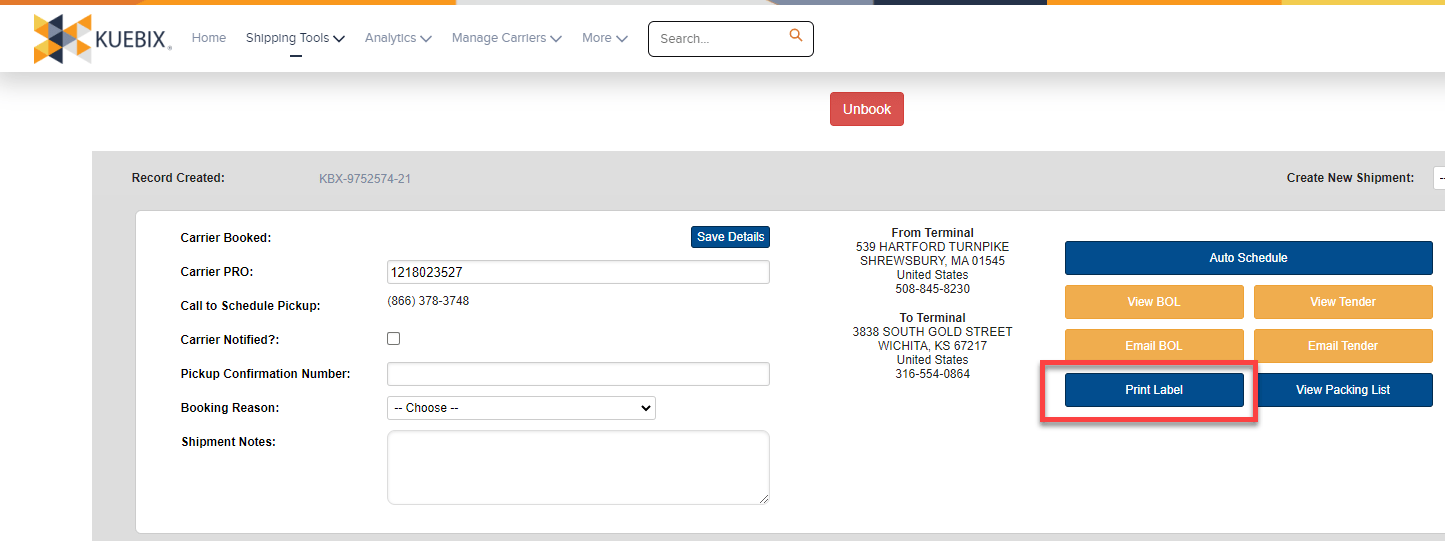
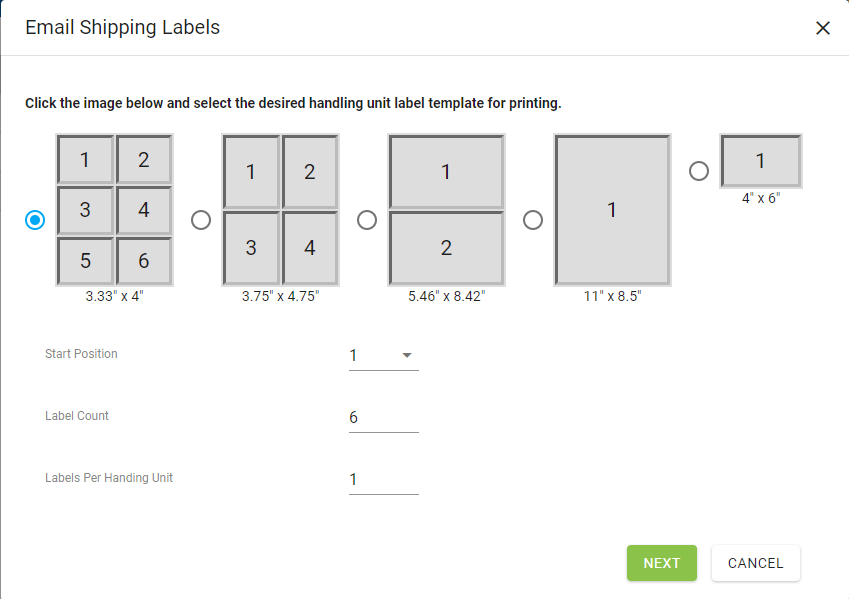
Clicking the button opens a new window to allow you to select the size and layout of the label.
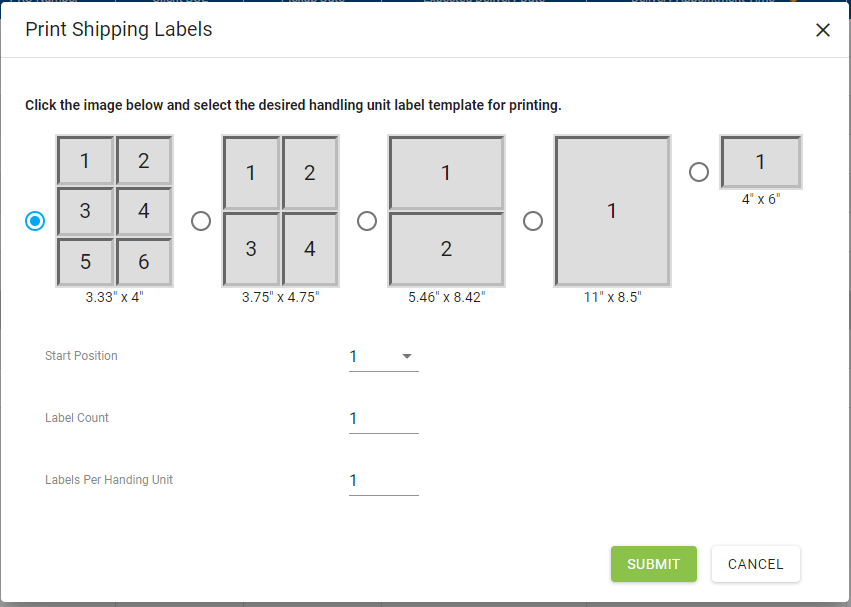
If you prefer to use a printer/paper template, hovering the mouse over each image will display the compatible label templates.
Clicking the green Submit button in the lower right corner will use your browser and system print settings to send the information to your printer.
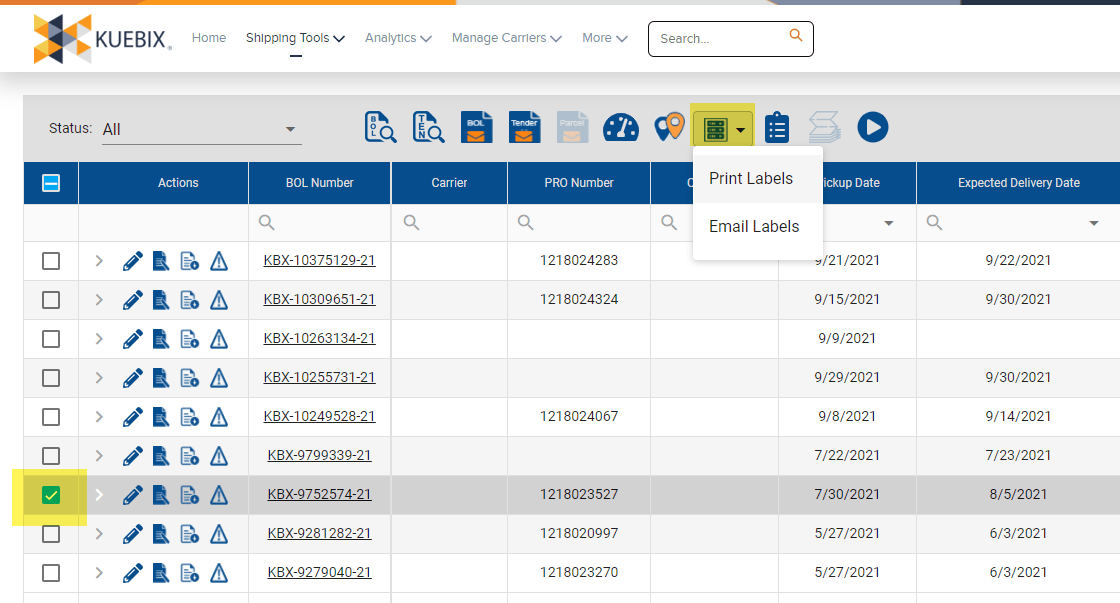
To Print from the Manage Shipments Grid –
Select the checkbox to the left of the shipment for which you’d like to print a label.
Click the Print/Email Label icon along the top icon bar.
Select the size and layout you would like, along with the starting position, label count, and labels per handling unit.

Clicking the green Submit button in the lower right corner will use your browser and system print settings to send the information to your printer.
Saving Labels
You can also save the labels to your computer and email them using your preferred email client.
After following the above directions, instead of selecting the printer you would like to use, you may have the option to “Save as PDF”.
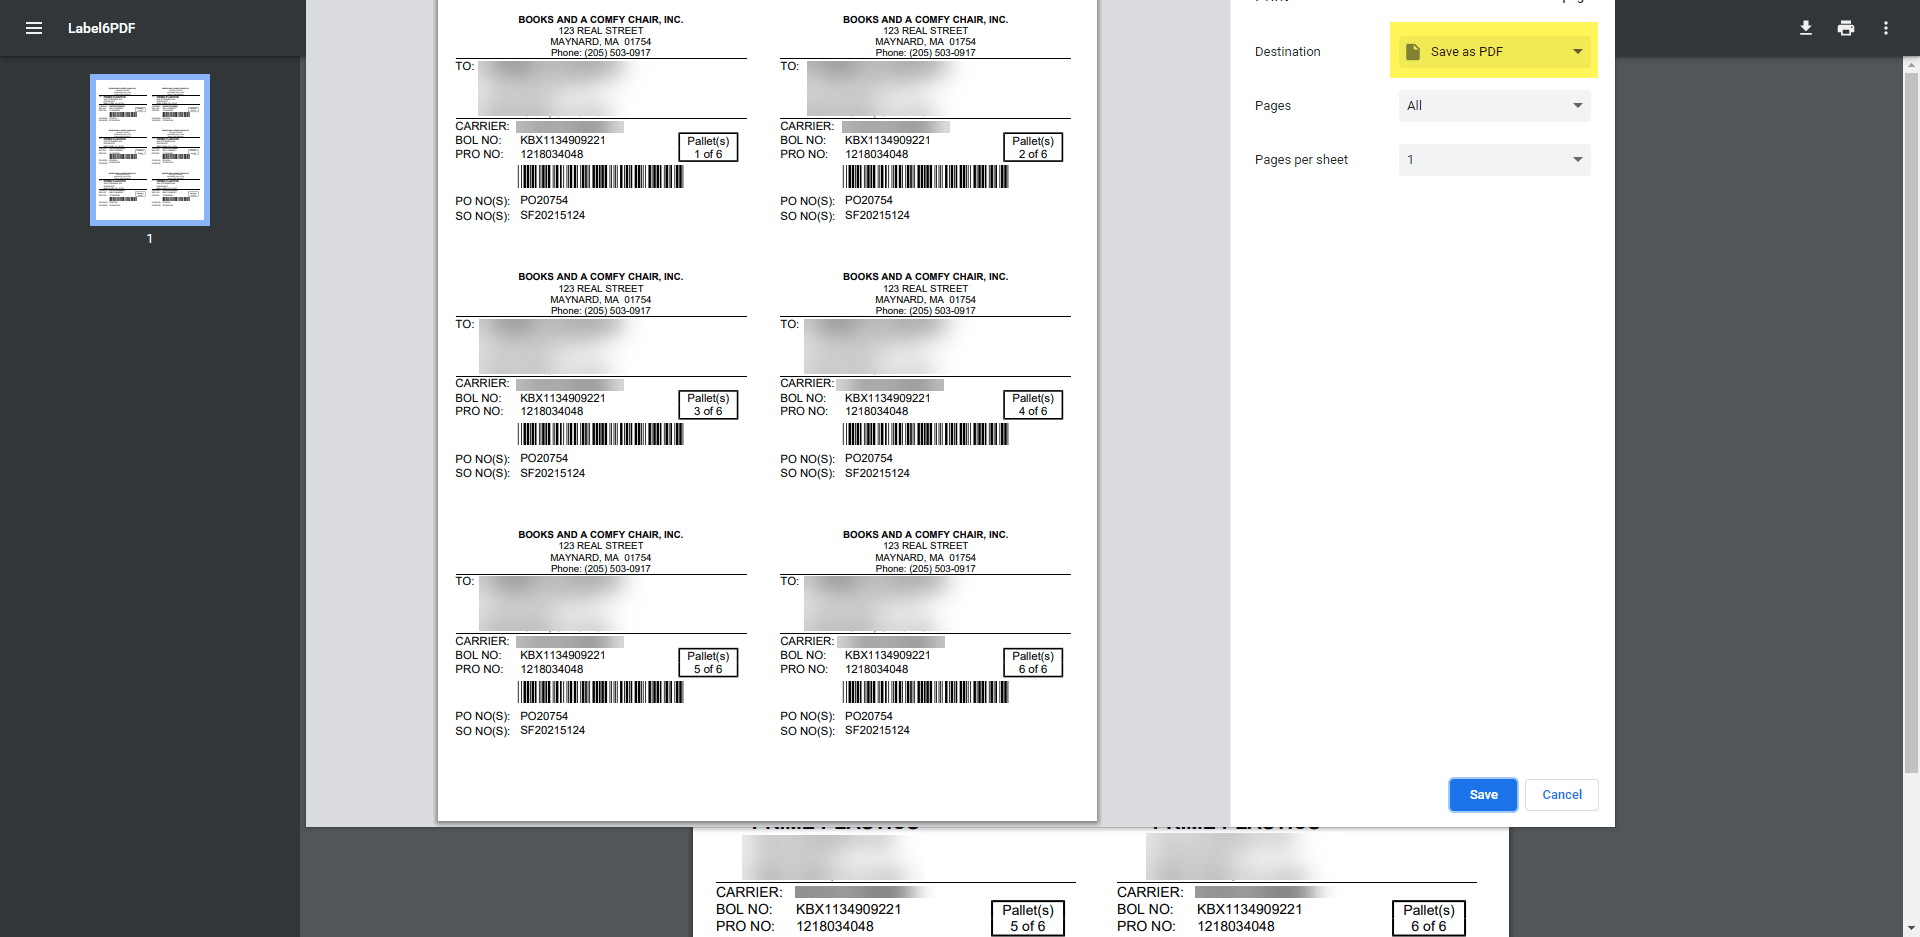
Selecting “Save as PDF” and then clicking on the blue “Save” button at the bottom will bring up a window so you can choose where the label will be saved on your computer.
To Email from the Manage Shipments Grid –
Instead of selecting Print Labels, choose Email Labels.
The same window will appear, asking you to select which size you prefer, however instead of a green Submit button, it will say Next.
Type the recipient email address, click Add Email Address, and then click Submit.
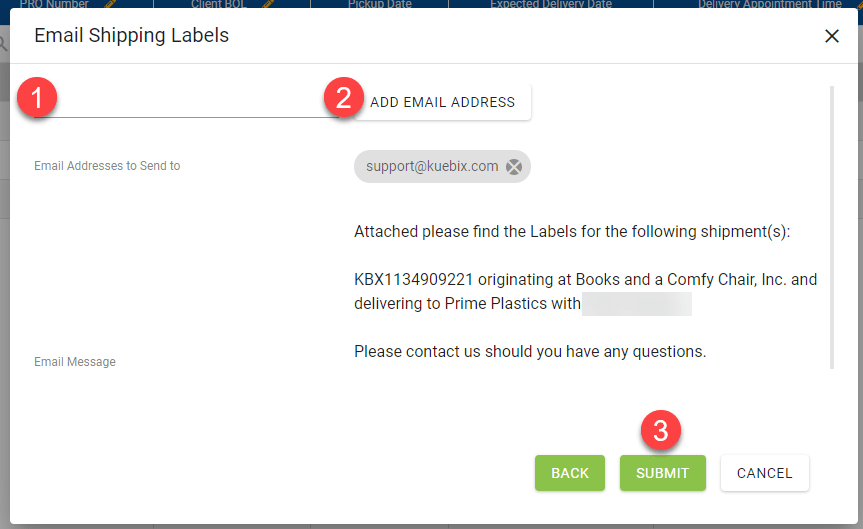
If you have more than one email address, simply repeat steps 1 and 2.

I had already began using this feature. I saves time!