Purchase Orders Schedule & Shipment Schedule
In the carrier portal, to add and schedule purchase orders for pickups and deliveries using the Purchase Orders Schedule tool, or Shipment Schedule tool, follow along with this video or the steps below. Purchase Orders Schedule is where carriers can add their customer’s purchase orders, then schedule dock appointments for pickups and deliveries.
To schedule a pickup or delivery for a specific PO, go to the Purchase Orders Schedule page in the carrier portal.
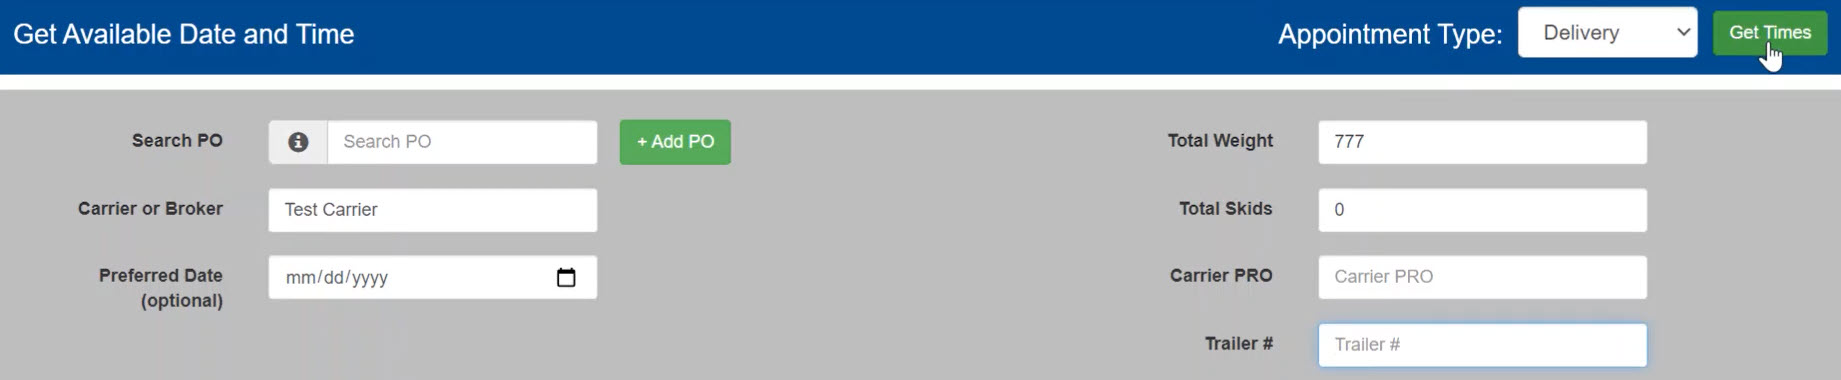
If applicable, select the Appointment Type: Delivery or Pickup (1).
If not applicable, just put the PO number in the Search PO field (2), and click +Add PO (3).

If you are picking up or delivering multiple POs at the same time, repeat the process until all of the POs are showing in the PO Summary Details.
Next, enter the name of the carrier that will be picking up the freight in the Carrier or Broker field. Select the correct carrier from the drop down option(s) that appear.
To select an alternative date, other than Original Requested Arrival Date, enter it in the Preferred Date field. This will allow you to view time slots on the requested date.
We recommend that you do not change the Total Skids or Total Weight here. If any of this information needs to be changed, please contact the customer directly.
The Carrier PRO and Trailer # can be entered, but they are optional. Once all of information has been entered, click Get Times in the top right corner.
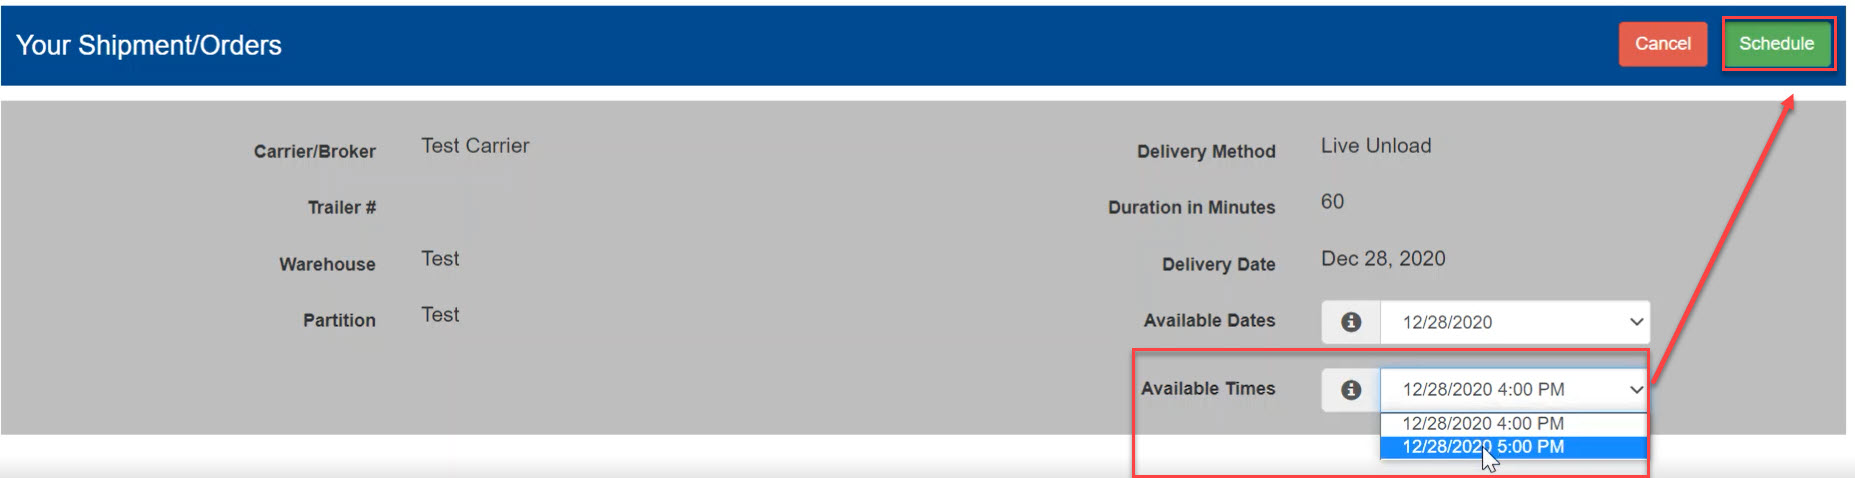
A list of Available Times will appear in the dropdown at the bottom of the page. Select your preferred time and click Schedule.
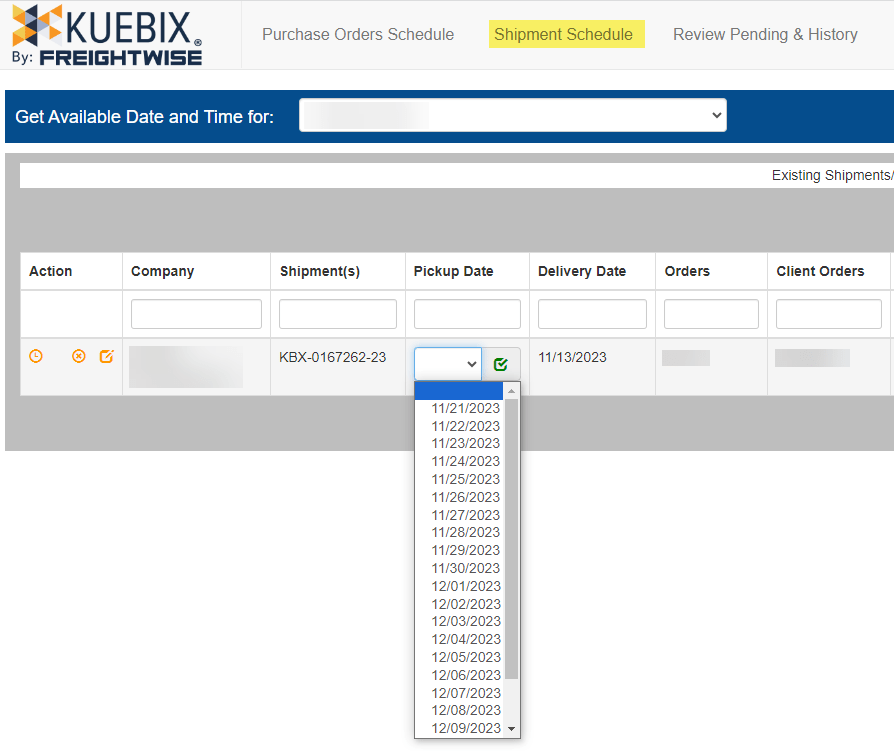
Shipment Schedule
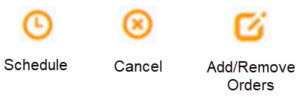
1. Schedule
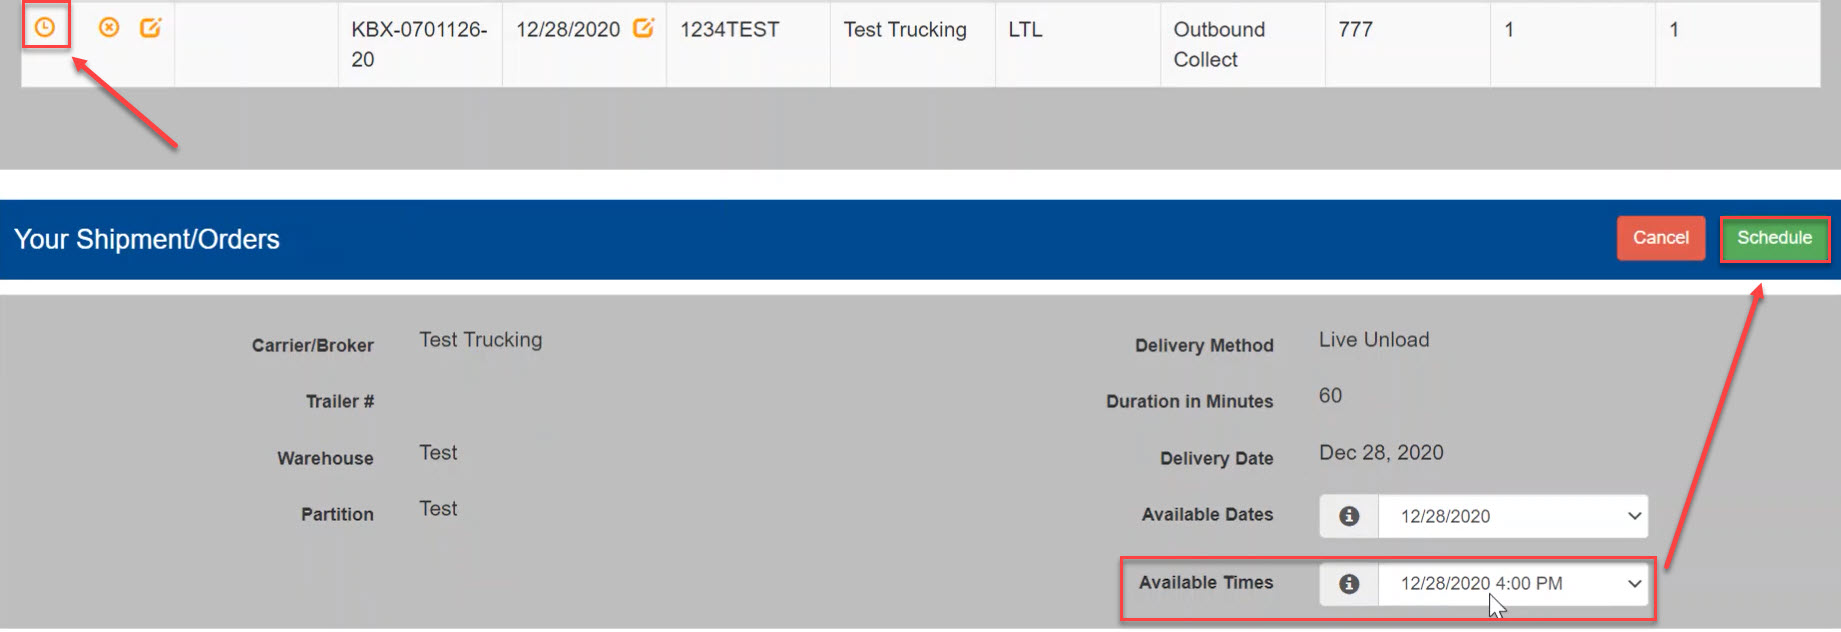
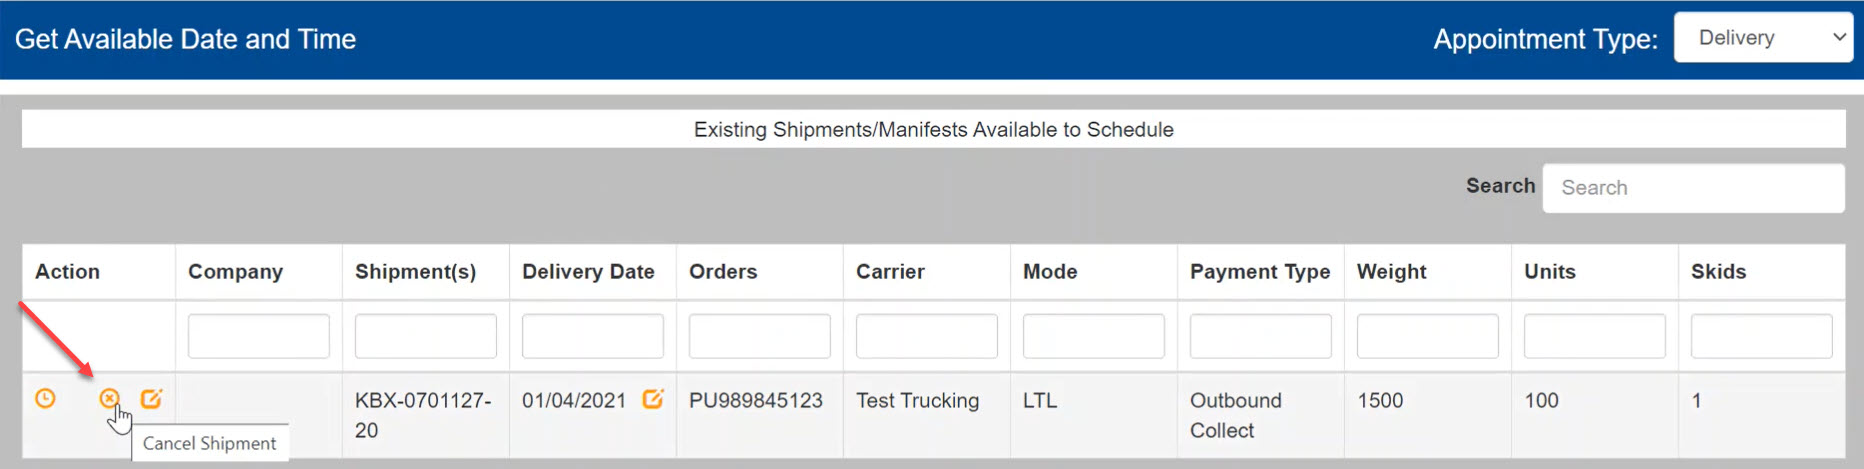
The Shipment Schedule page contains the shipments that are booked but have not been scheduled for pickup or delivery. You can schedule the shipment by clicking the Clock icon to get available times. As in the PO Schedule window, a list of Available Times will appear in the dropdown at the bottom of the page. Select your preferred time and click Schedule.
2. Cancel
To cancel a shipment, click the Cancel icon next to the shipment. Select the reason for cancellation in the popup window and Confirm Cancellation.
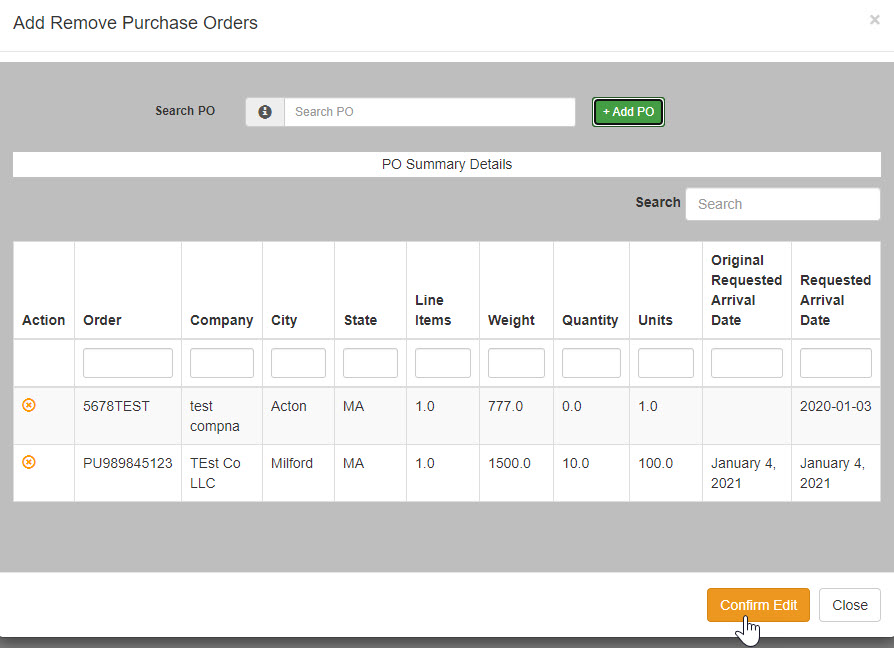
3. Add/Remove Purchase Orders
To add a purchase order to a shipment, click on the Add/Remove Orders icon under Actions. In the popup, search for the PO you would like to add and click +Add PO. Then, click the + next to the PO you are adding. Finally, click Confirm Edit to finalize adding the PO.
To remove a purchase order from a shipment, click on the Add/Remove Orders icon under Actions. In the popup, click the Remove Order icon (x) next to PO you want to remove and Confirm Edit.
Review Pending and History
All booked and scheduled shipments will move to the Review Pending and History page. On this page, you can monitor upcoming appointments, add POs, or cancel appointments. These can all done as they are in the Shipment Schedule screen, as described above.
To cancel an appointment, click the Cancel Shipment icon (x). This will allow you to schedule a new pickup later without completely cancelling the shipment. In the popup, select a reason for cancellation, and Confirm Cancellation.
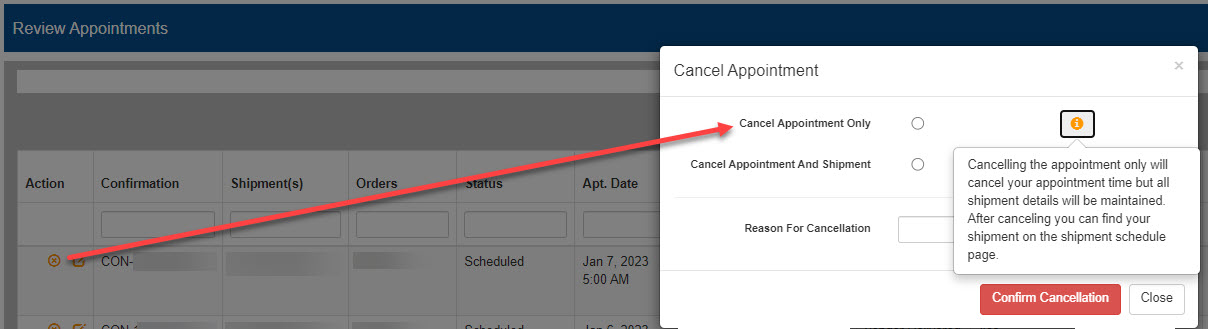
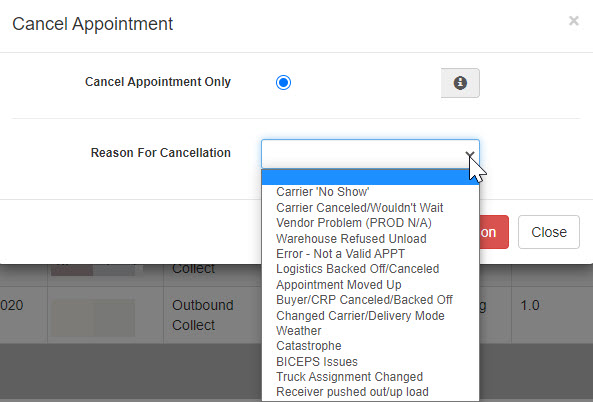
Cancelling your appointment will only cancel your appointment time but all shipment details will be maintained. After cancelling, you can find your shipment back on the Shipment Schedule page.
To adjust the pickup date after a shipment has been scheduled, cancel the current appointment using the above instructions, and then adjust the pickup date on the Shipment Schedule page.
If you have any questions, please reach out to support-kuebix@freightwisellc.com with your login email, PO number, and any screenshots applicable.