Saving Addresses and Contacts
Saving a commonly used address helps make shipping easier and can be saved using one of the following methods.
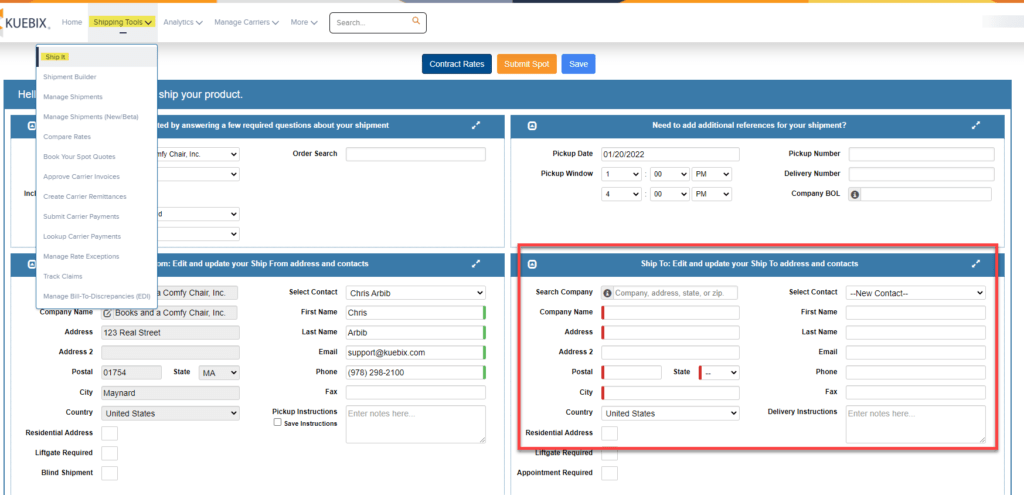
Using Ship It
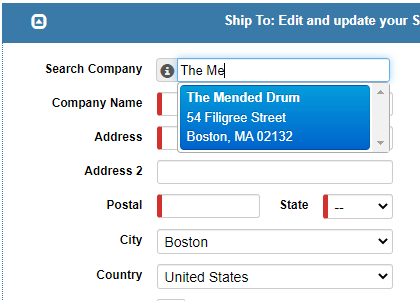
When creating a shipment in Ship It, using the Search Company field will bring up previously saved address and contact information.
Enter the company details in the appropriate fields. To save a phone number, a first and last name are required, though these can be “Shipping Contact” if a person is not known.
Once the information is entered, an option to save the Address (and Contact if applicable) is available.
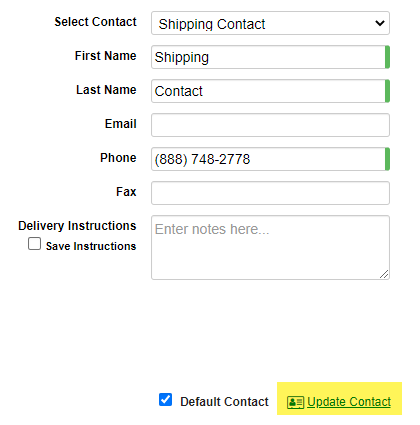
If a contact has been provided, the option to make the contact the default one associated with the address is auto-selected. If you do not want the contact to be the default, uncheck the box. Once saved, they will be available in the Select Contact drop down menu.
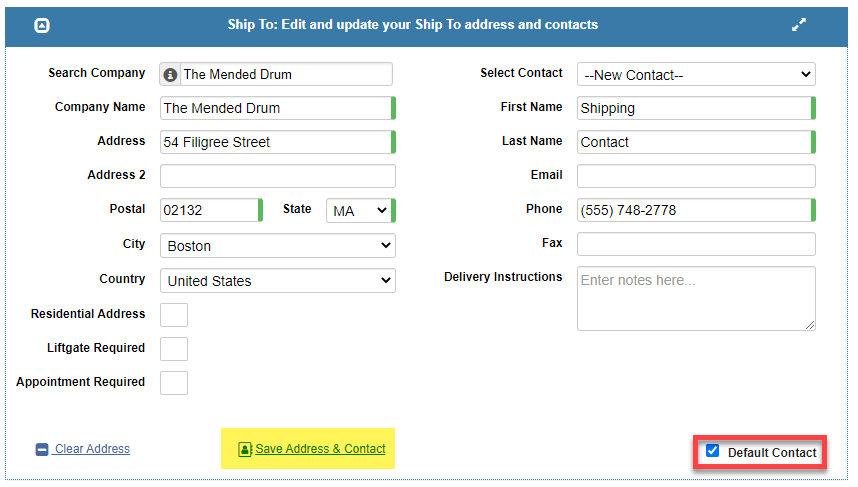
The same steps can be repeated if you’d like to add more than one contact, which then become available in the Select Contact drop down menu.
The next time you create a shipment, type the company name into the Search Company field to bring up the information as either a Ship To or Ship From option.
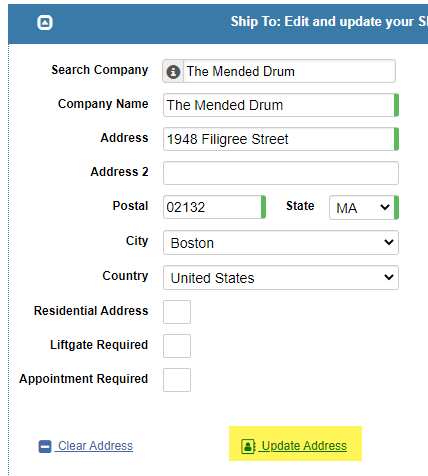
Updating the saved information works similarly and allows you to easily make adjustments.
Enter the company name in the Search Company field, and then update the appropriate information. Once you type, the option to Update Address appears.
The same applies for updating contact information.
Please reach out to support at support@kuebix.com if you would like to remove an address or contact, or if you would like to bulk upload multiple addresses and/or contacts.
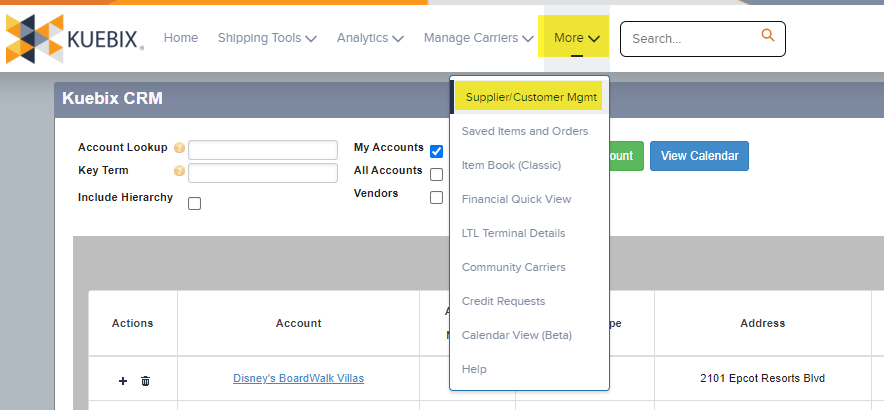
Using Supplier/Customer Mgmt
Information can also be saved using Supplier/Customer Mgmt, accessible via the More menu along the top of the screen.
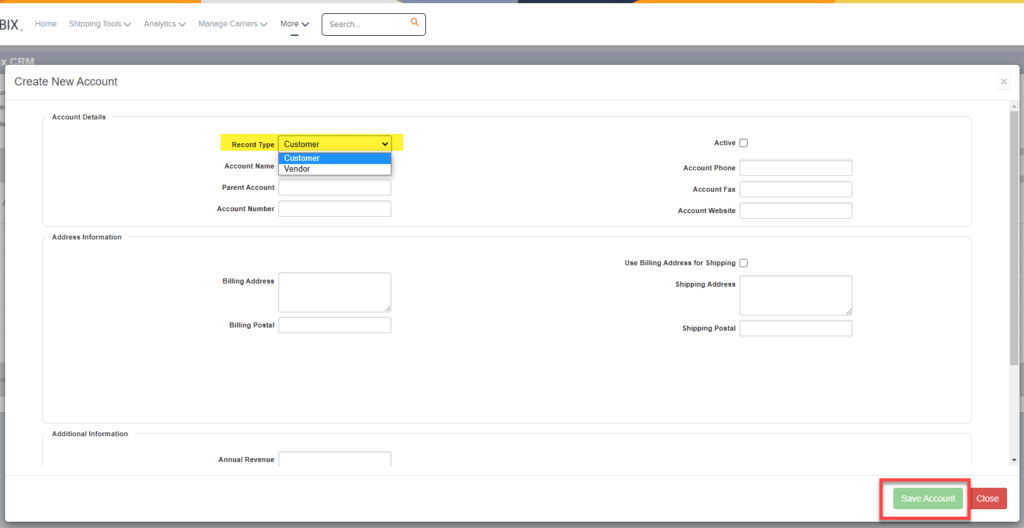
Select which type of record you want to create and then enter all relevant information. Once the information is entered, click Save Account.
Using Data Upload Tool
If you have multiple addresses to save, the Data Loader is recommended.
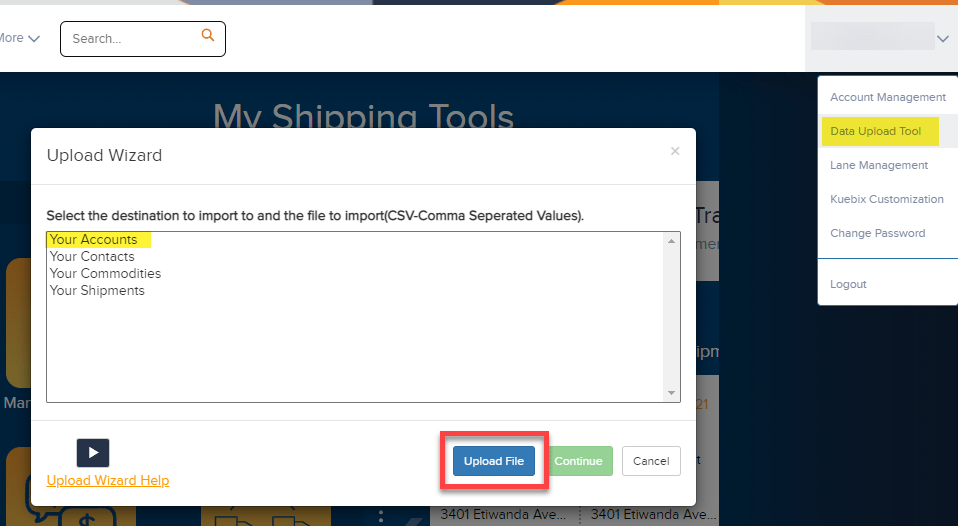
From your login info in the upper right corner, click Data Upload Tool, select the type of information you’re uploading, and then click Upload File.
Navigate to where you have the .csv saved, and select the file.
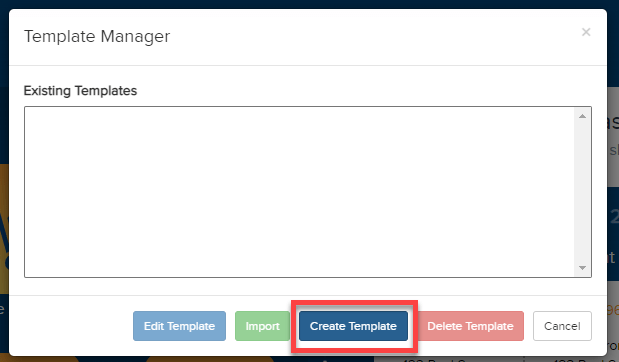
On the Template Manager pop-up, select Create Template.
After naming your template, click Auto Map Fields.
If you prefer to use your own template, you will need to manually map the fields.
After mapping the fields, click Save Template.
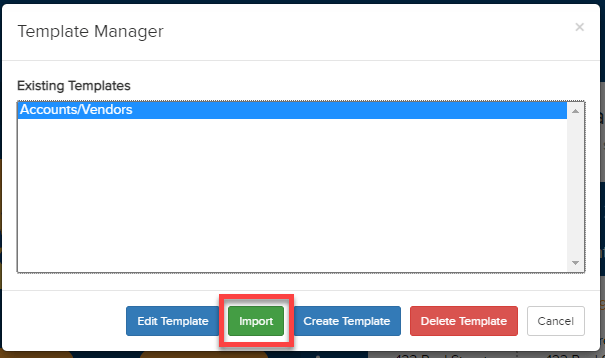
Select the template just created, and then click Import.
Once the upload finishes, the account information will be available in Ship It.
Please reach out to support at support@kuebix.com with any questions or issues.