Use the Load Builder to create LTL, truckload and Multi-stop truckload shipments. The user can plan one load at a time, or all loads for the day within a single screen. Once shipments have been created from the Load Builder, they can be tendered to carriers from Manage Shipments- Saved Status.
There are four main parts of the Shipment Builder.
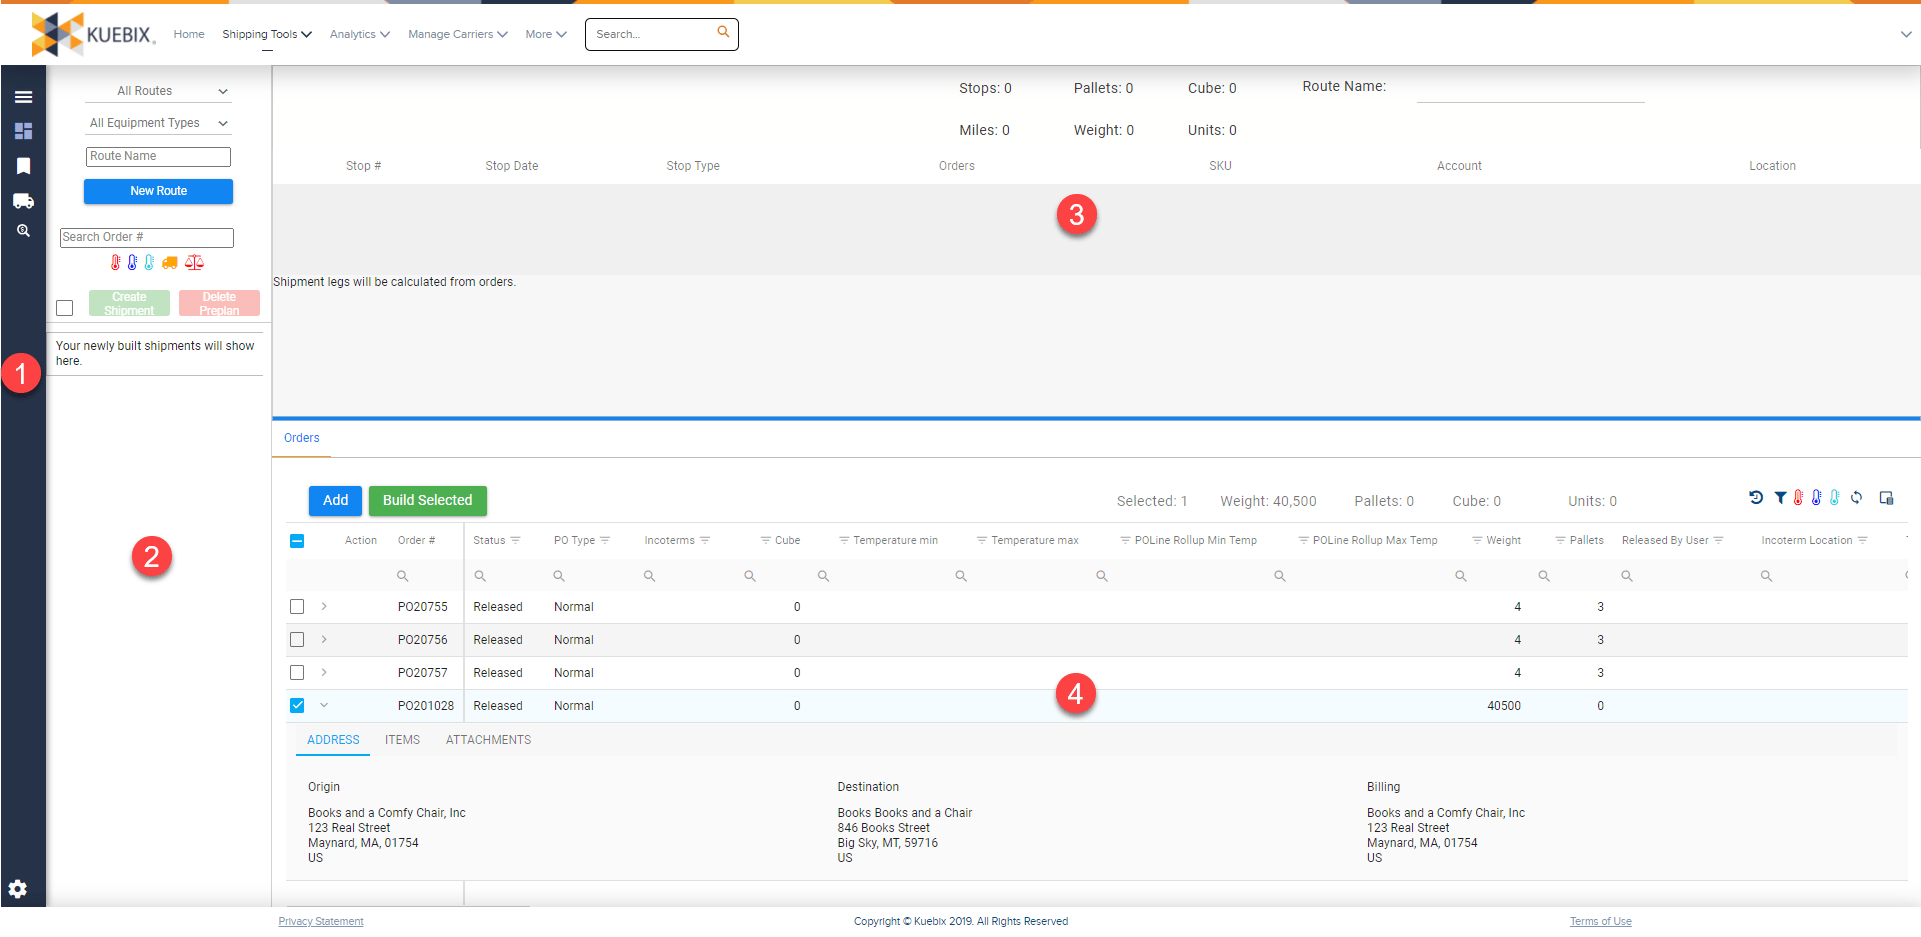
- The Sidebar

The Sidebar – from here Preplanned shipments can be revealed/hidden when in the Load Builder view.

The Load Builder – shows Preplanned loads, the Shipment Building Area, and the Orders that have been sent to Kuebix.

Order Management – Displays the orders that have been sent to Kuebix. Orders can be filtered by temperature type.

Manage Shipments – quickly access the Manage Shipments Grid without leaving the Shipment Builder.

Load Match – currently in development, more info to come!
2. Preplanned Loads – Preplanned loads (preplans) are orders that have been built with but are not yet on a shipment. Orders on preplans can be created, deleted and edited.
3. The Building Shipment Area – From here you can add multiple orders to a single shipment, name a preplan, and update pickup/delivery dates.
4. Orders – The list of all orders that have been sent to Kuebix. Orders can be filtered by pickup dates, delivery dates, shipping location, etc.

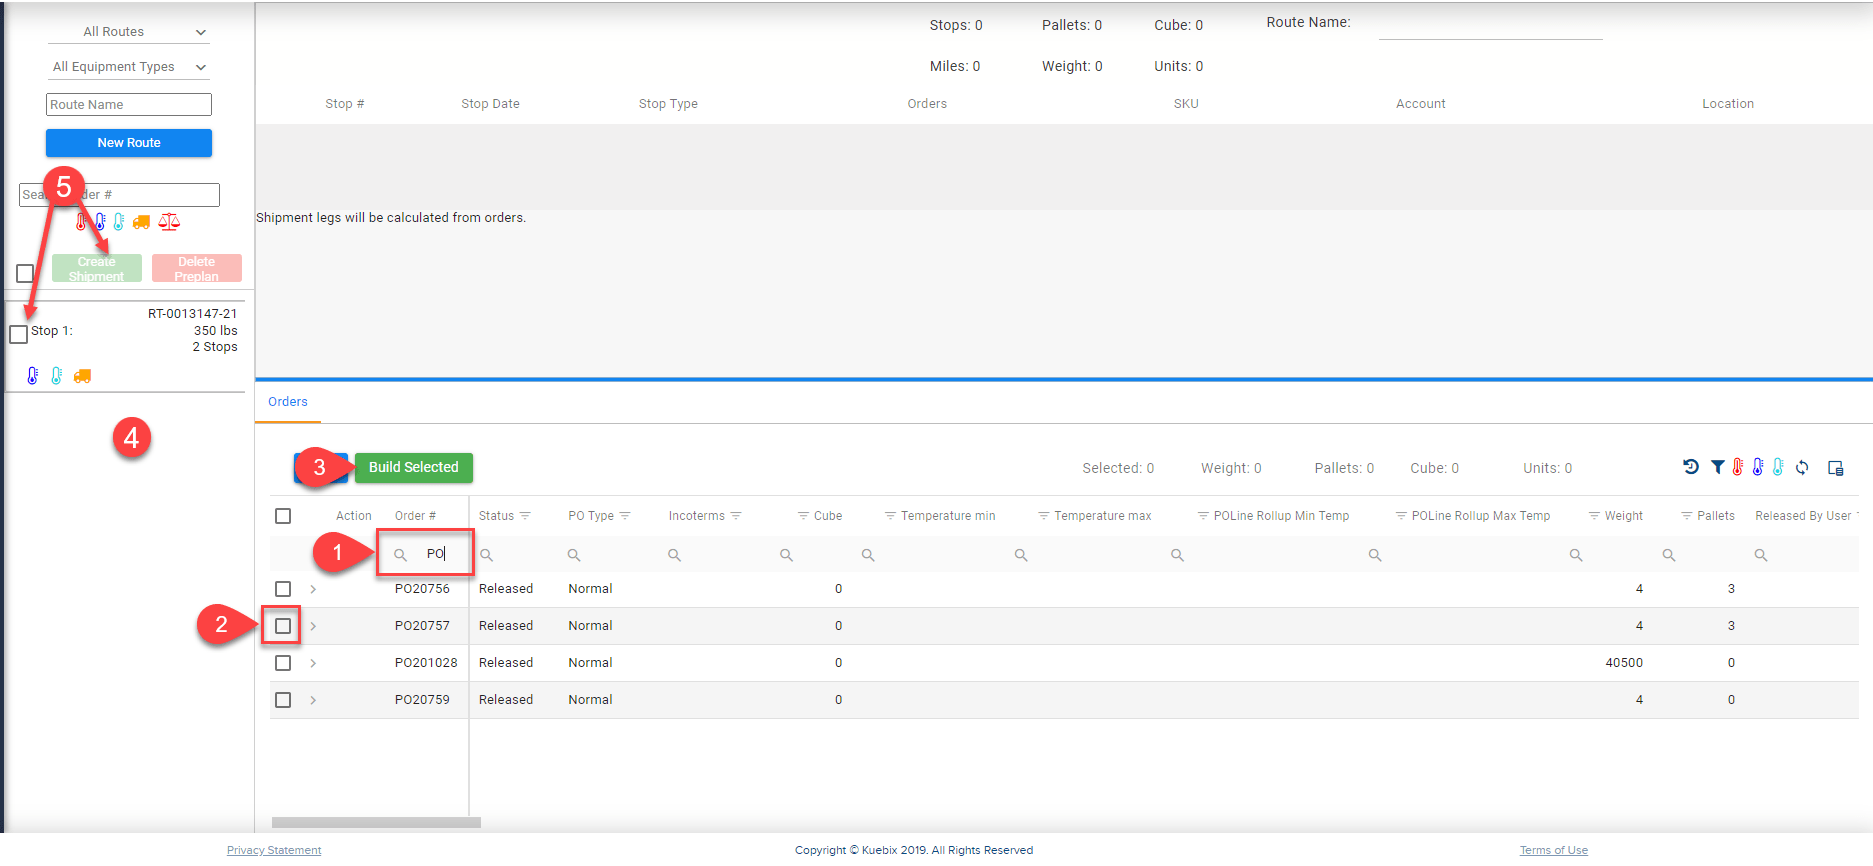
Left to right – Recall recently removed orders, clear filters, sort shipments by hot temp, sort shipments by cool temp, sort shipments by cold temp, refresh the grid, and choose columns. Hovering over the icon will also show the action.
To create a shipment with a single order:
- Locate the desired order by searching in the column headers, (e.g. order number, shipping address, pickup date).
- Click the checkbox to the left of the correct order.
- Click the green “Build Selected” button.
- The built order will be visible with any other pre-planned loads in the left column.
- Finalize the order by clicking the check box in the left column and selecting “Create Shipments” or you can wait until you finish building any other pre-planned loads, select all loads using the check boxes, and then click “Create Shipments”.
Finalized loads can now be tendered and booked with a carrier, or spot quotes can be requested.
Creating a Multi Order Shipment
- Select the desired PO by searching the column headers, or by sorting.
- Once located, click the check box to the left of the PO. Repeat steps 1 and 2 for any/all additional POs you’d like added to the shipment.
- Once POs are all selected, click the blue “Add” button. This triggers the total weight to be calculated, and adds stops to the shipment.
- If needed, re-order or sequence the stops as needed.
- Orders can be removed by clicking the X next to the order number, in the order column.
- Click “Build Plan”, in the upper right corner.
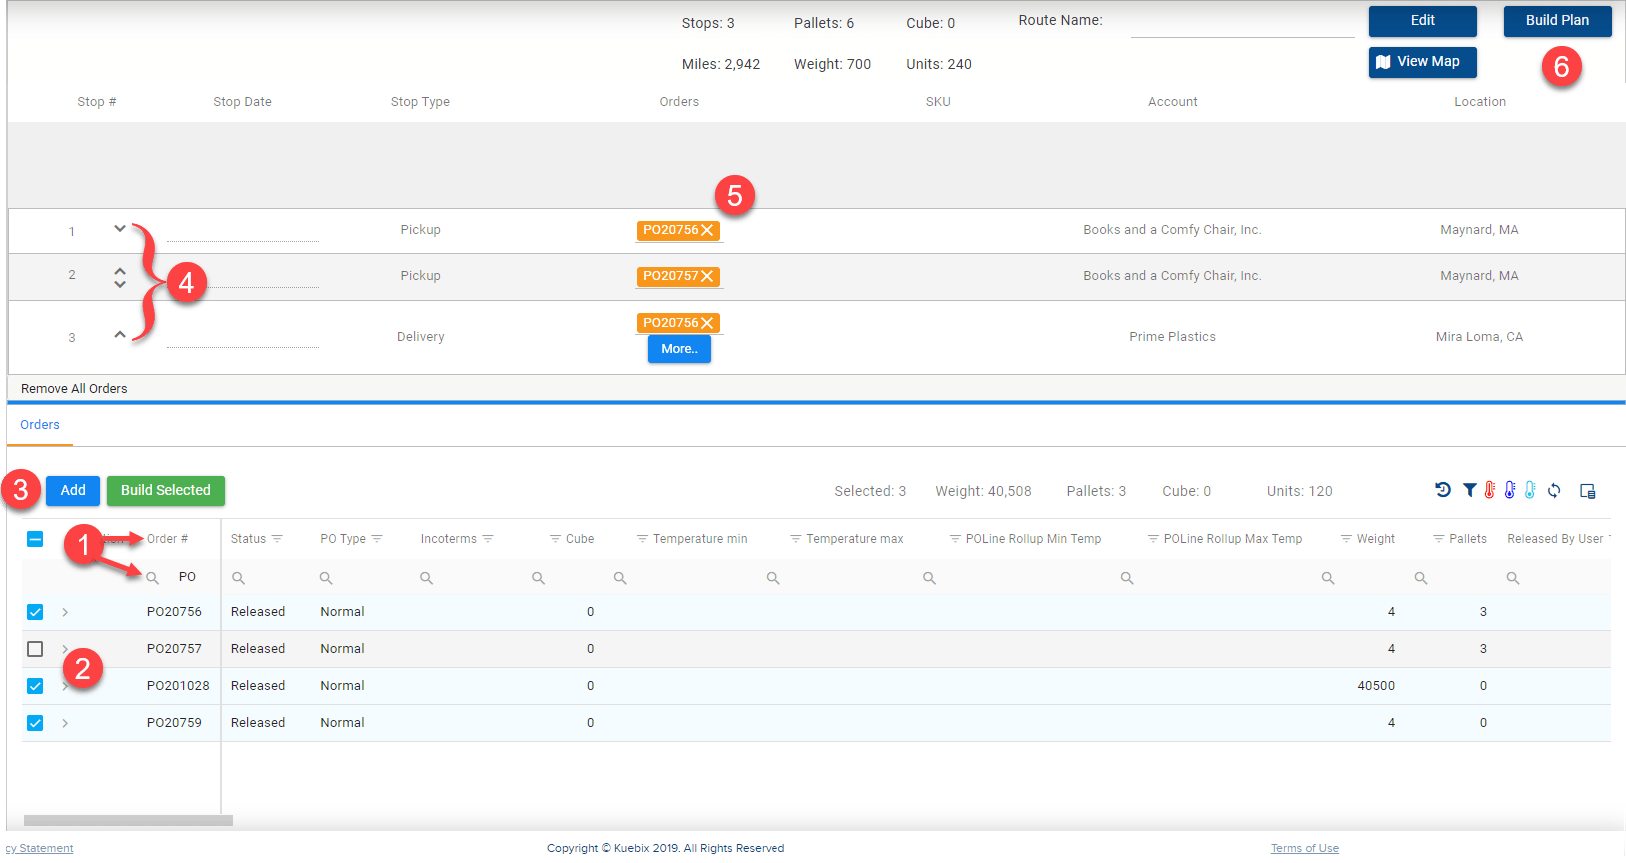
Once built, select your shipment and “Create Shipment” from the preplanned loads in the left column, or continue building additional shipments, and select all shipments and “Create Shipments”.
Using the “Build Selected” button will create a single shipment with a single order.
Adding Orders to a Pre-Planned Load
- Locate and select the pre-planned load.
- After the pre-planned load is selected, it will appear in the load building section.
- Search and select any orders you would like to add.
- Click “Add”
- If needed, re-order stops.
- Click update to save your changes to the load.
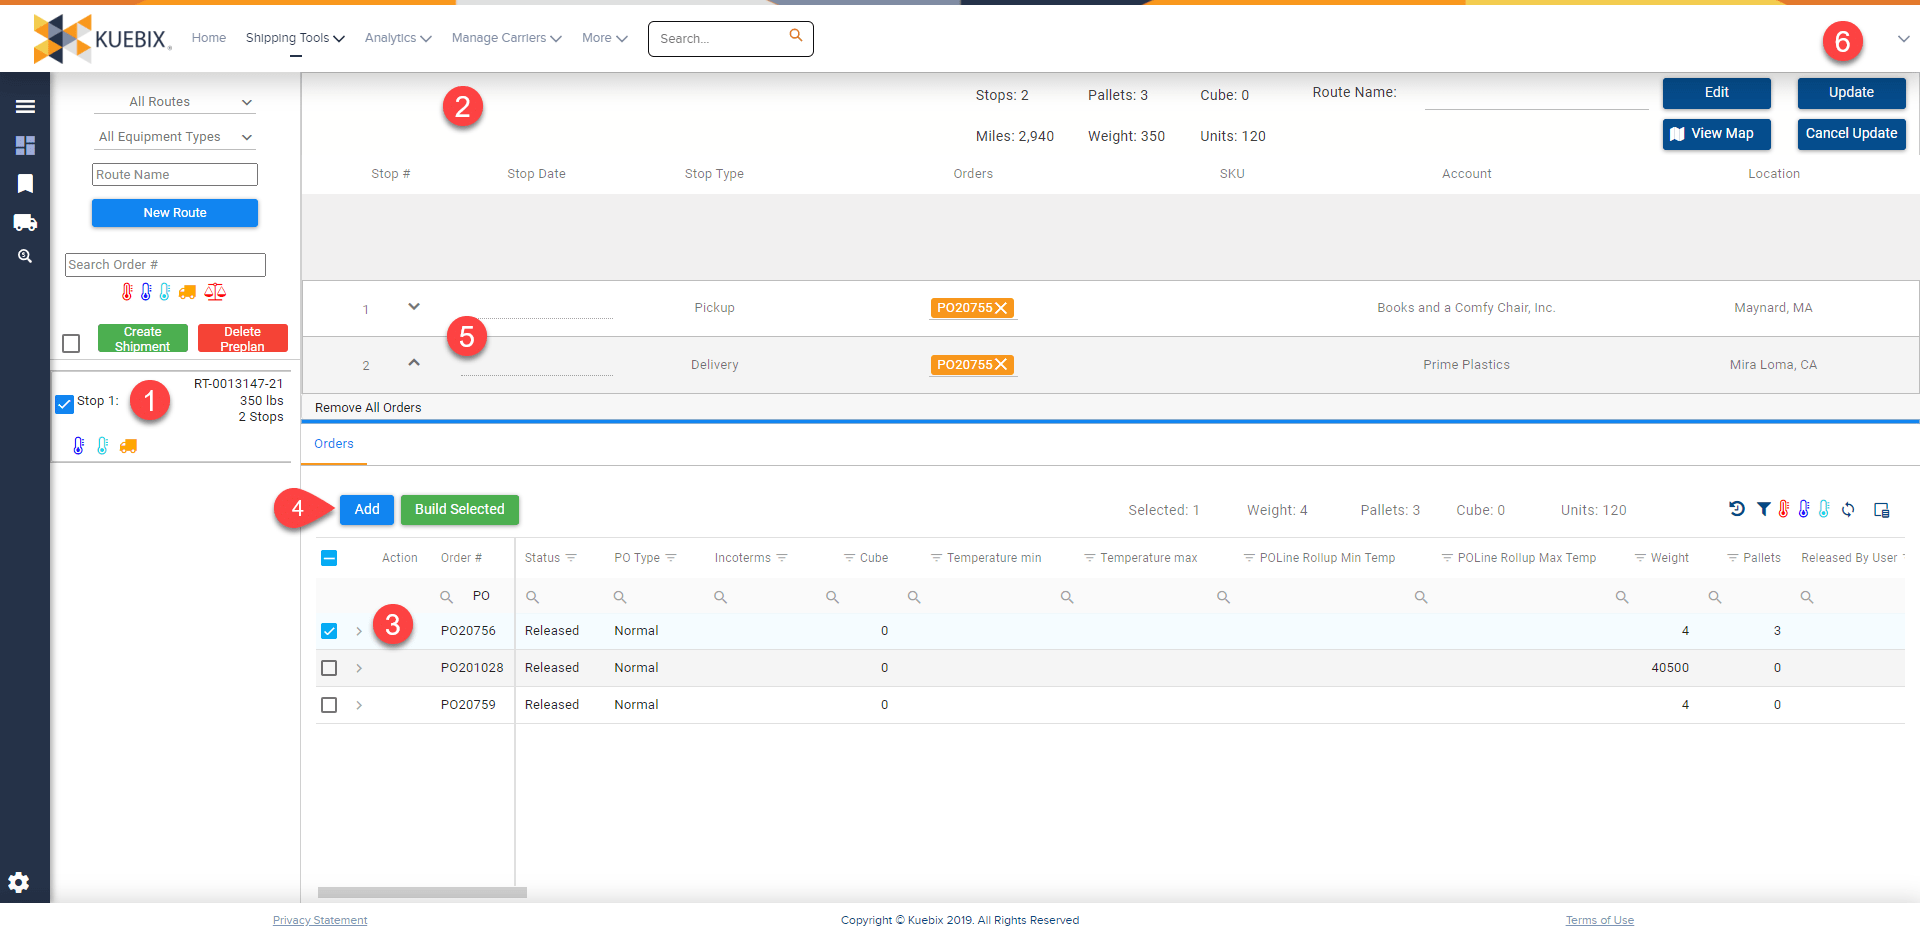
Once the loads have been created and saved, they can be accessed via the Manage Shipments Grid.
